The classic VW Beetle is probably the single most iconic car ever made. Regardless of where you go, you will see a VW Beetle somewhere on the road. While the uninitiated may think they are uncomfortable and twitchy, the truth is that the interior of a Bug is kind of like Dr. Who’s Tardis: it is a lot bigger on the inside that it looks. That doesn’t mean every Beetle you hop into is comfortable – the seats are very simple in design, using a smattering of steel springs and horsehair padding.
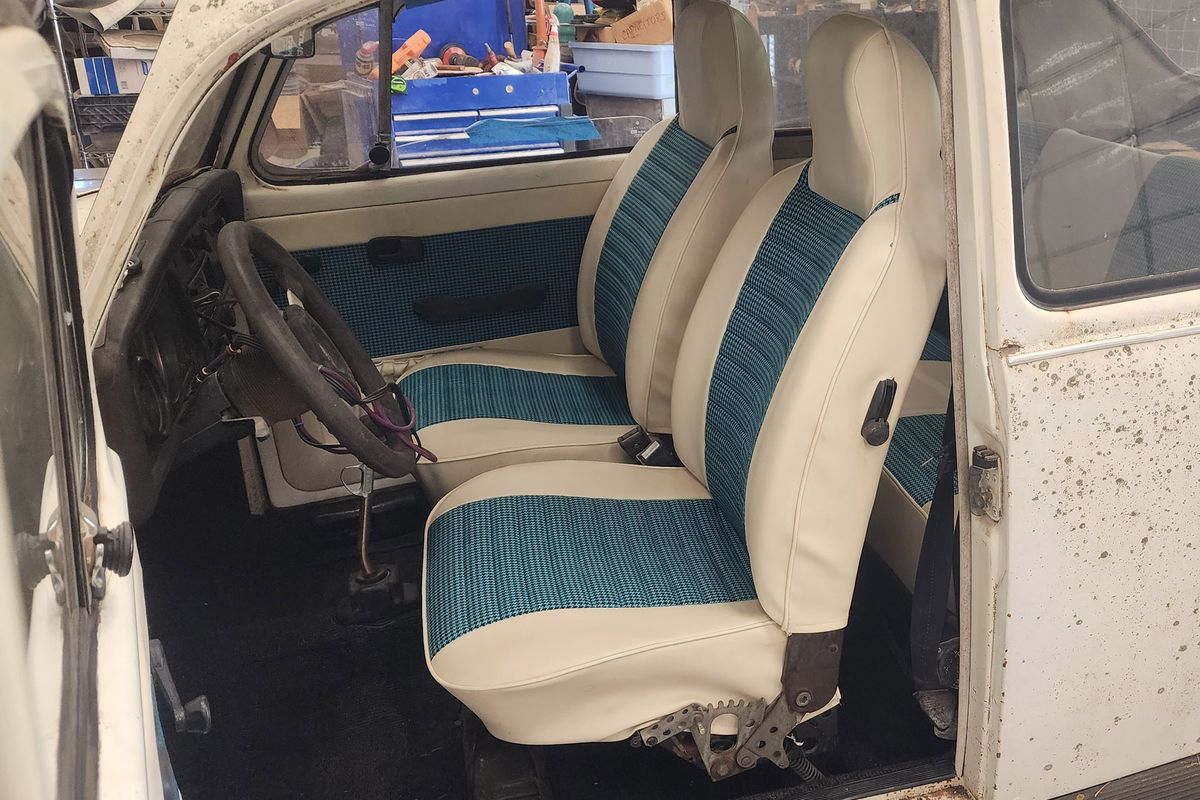
Our 1973 standard Beetle had the original seats with the original covers, which were in surprisingly good shape considering they are 50 years old. In fact, this car was built in May 1973. The seats were serviceable for a casual driver, but you could feel the springs moving in your back and posterior. The driver side cover was decent but the passenger side lower had developed some cracks, so their days were numbered. The Bug already had a big bore 1834-cc with twin carbs and custom cam, along with a Freeway Flyer trans and the car had been lowered 1.5 inches, so the interior needed some resto-modding to match. We picked up the phone and called TMI Products to see what they had to offer, and much to our surprise, the answer was quite a bit.
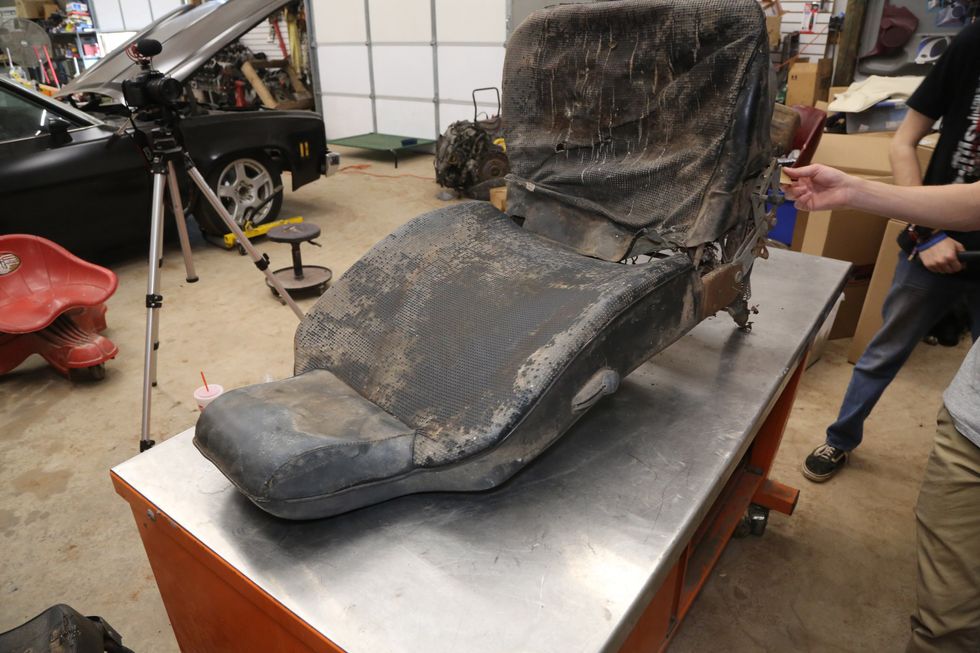
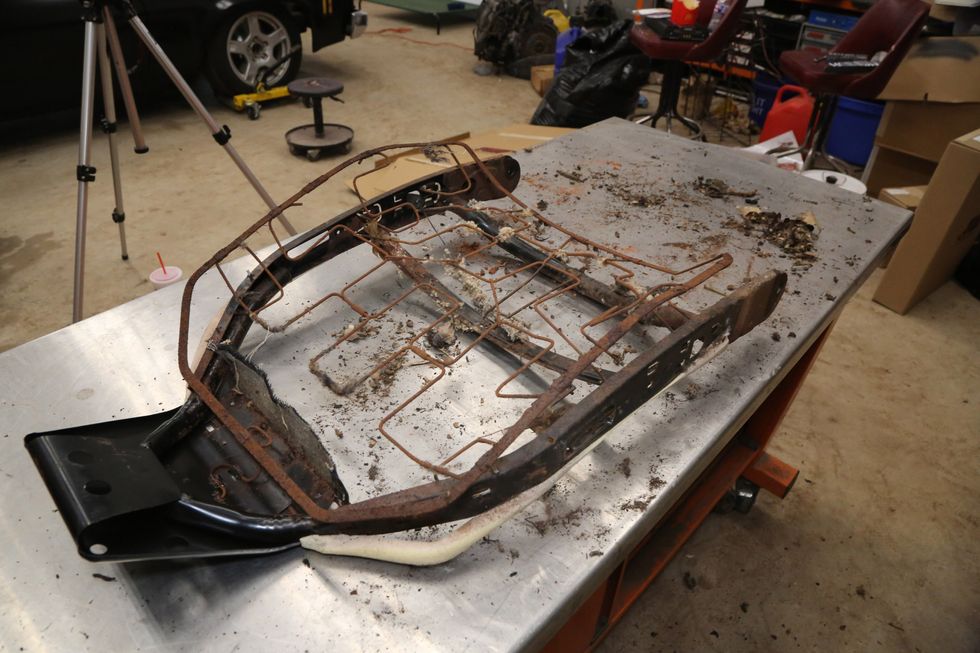
With the seats out on the bench, you can really see just how crusty they really are. These desperately need some new clothes. Photo: Jefferson Bryant
We expected a few stock patterns, and maybe a couple of ready-made custom layouts. Instead, we had a world of colors and patterns to choose from. This really opened the door to fantasy land, and in the end, we settled on a really beautiful turquoise houndstooth center fabric with a cream vinyl outer. This design was carried throughout the interior- front seats, rears, and door panels. This isn’t something TMI did special for us; this is how they operate, and it elevated the interior from stock to striking. Along with the covers, we also ordered a set of new seat foams, which allow you to ditch the stiff uncomfortable horsehair pads.
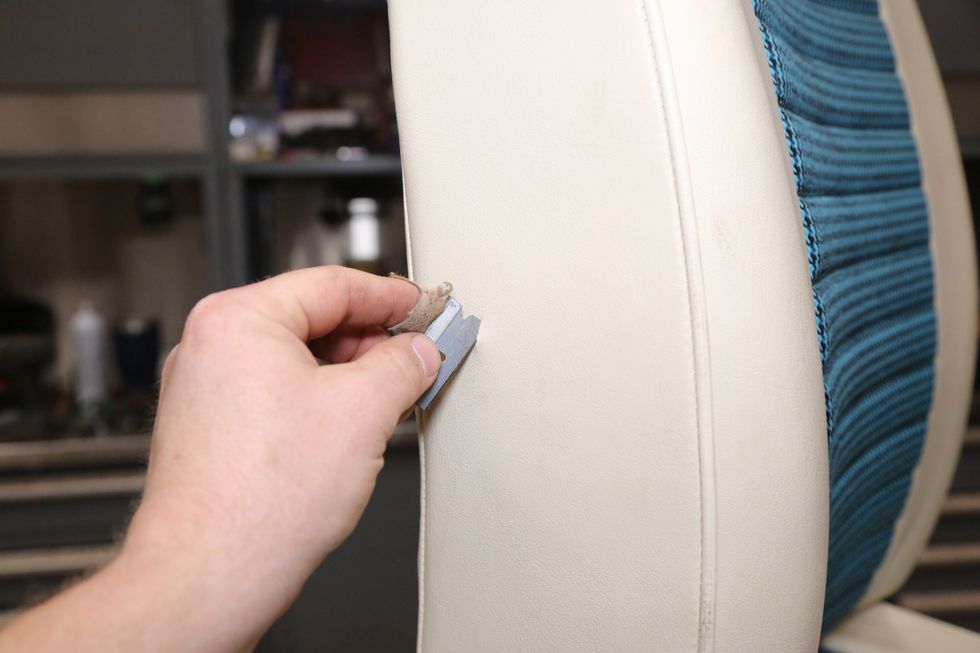
Once we had the covers off, we saw that these seats had been “customized” at some point with some cardboard over the springs to stiffen the seats. The original padding was quite stiff and had no give left. We removed all of it in favor of the new foams from TMI, which add much needed compliance to the cushions. There are a couple unique aspects of the VW seats. Instead of hog rings, the buckets use sharp metal tabs to pierce the upholstery. Because of this, you need some listing wire. The new covers do not come with this, but the original wire should be reusable if it is not badly rusted. If it is too far gone or missing, a little strip of bailing wire is a suitable replacement. The covers also use a drawstring on the bottom cushion to pull it tight. This is tied to either side of the frame.
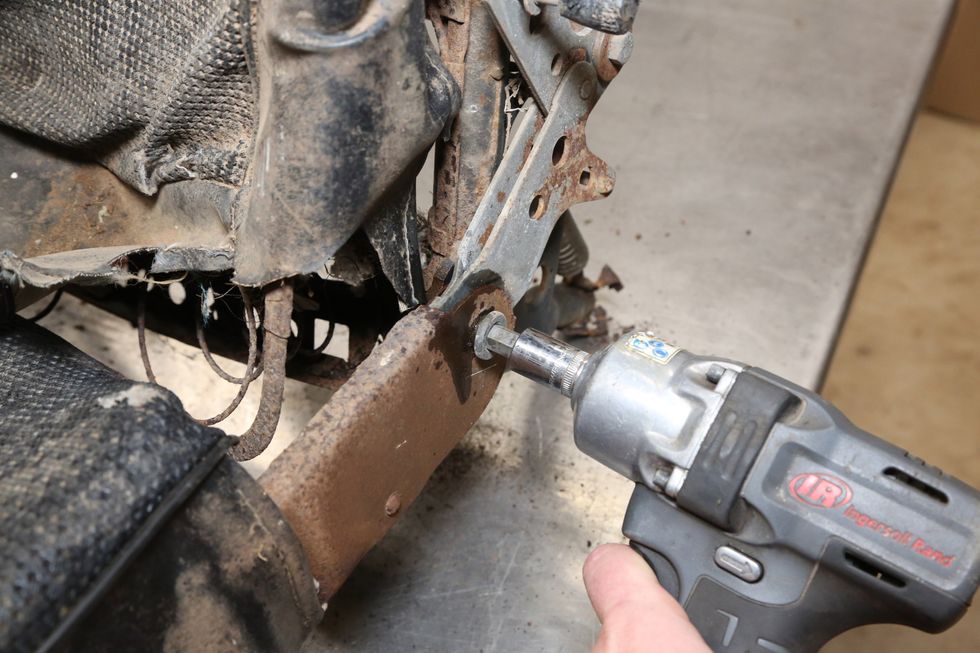
The two halves separate by removing the large shoulder bolts on the sides. The bolt is a 10mm Allen-head. Photo: Jefferson Bryant
We ran into a big problem on our seats when we took them apart, however. This being our first VW Bug, we were not aware that VW seats changed quite a bit and that they are often swapped around. We ordered covers for our ’74 Beetle, and when we were ready to install the seat back covers, the new foams didn’t make any sense of how they fit. We called TMI tech support and sent some pics. Turns out we had 1973 seats; in fact, the car was a ’73, but titled as a ’74. The DMV must have made a typo, as the VIN matches. ’73 Volkswagen seat backs are a one-year only, and we had covers for 1974-’76 seats. Luckily, we were able to find a set of ’74 seat backs, which will swap over to the ’73 lower frame, so crisis averted. Let this be a warning to you: before you order seat covers for a Beetle, check to make sure you have the right year. It was not something we thought to do, and was a clerical error on the vehicle’s title – even the guy we bought the car from told us it was a ’74, so understand that you don’t know what you don’t know sometimes.
Installing the covers was a simple process. Each one takes about 20-30 minutes per section (back and lower), and we had both seats done in about 2-3 hours, all told. The finished seats shown here are without the plastic trim that they should have. One side on each of our seats had broken plastic trim, which we need to replace. That will be done later when we replace the dash and all the interior plastic trim parts at once. The new seats are much more comfortable and they look incredible inside the VW. They look great, and our backs and backsides appreciate the change.
Recovering Your Volkswagen’s Seats – A Step-By-Step Guide
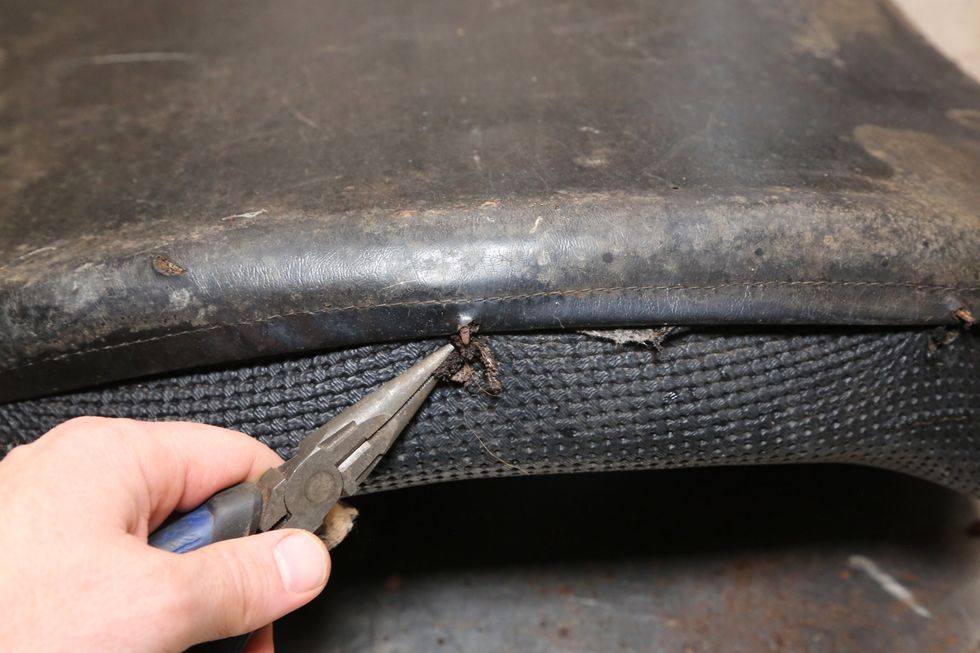
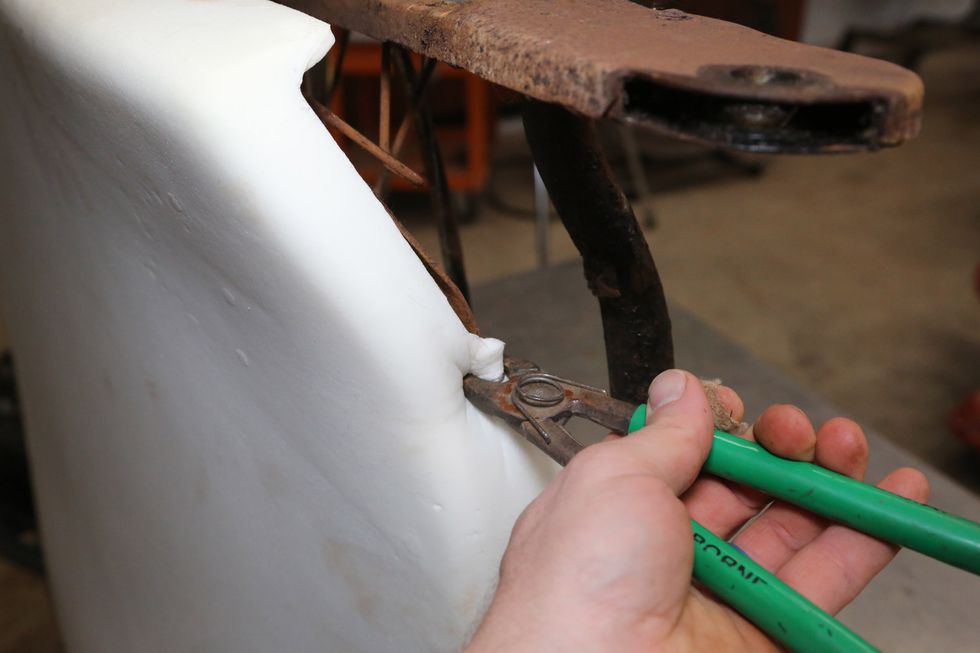
We started with the bottom cushion. These tabs are both VERY sharp and fragile. We used a pair of needle-nose pliers to gently pry them up. If it breaks, you don’t have many options, so be careful. You will see a band-aid on a finger in many of these pics… yes, it hurt for days. They are sharp and dirty, so be careful. The front and rear edges have a thick listing wire inside the cover, this is reused if possible.
Recovering Your Volkswagen’s Seats – A Step-By-Step Guide

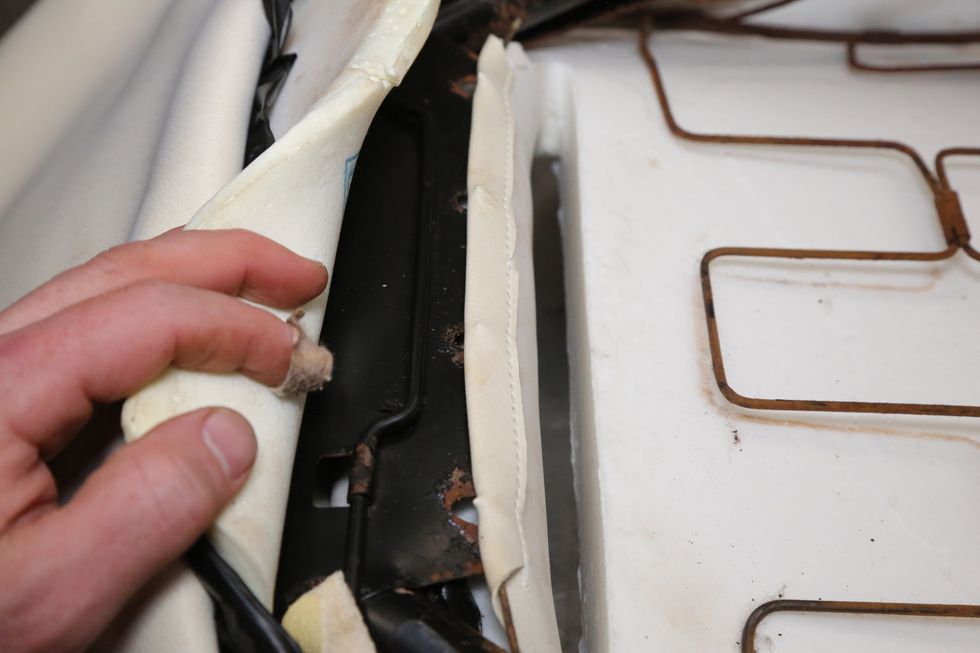
The original horsehair pad is really grungy. This is trash, as is the cardboard liner a previous owner had put in place. We replaced the pad with new foam from TMI.
Recovering Your Volkswagen’s Seats – A Step-By-Step Guide
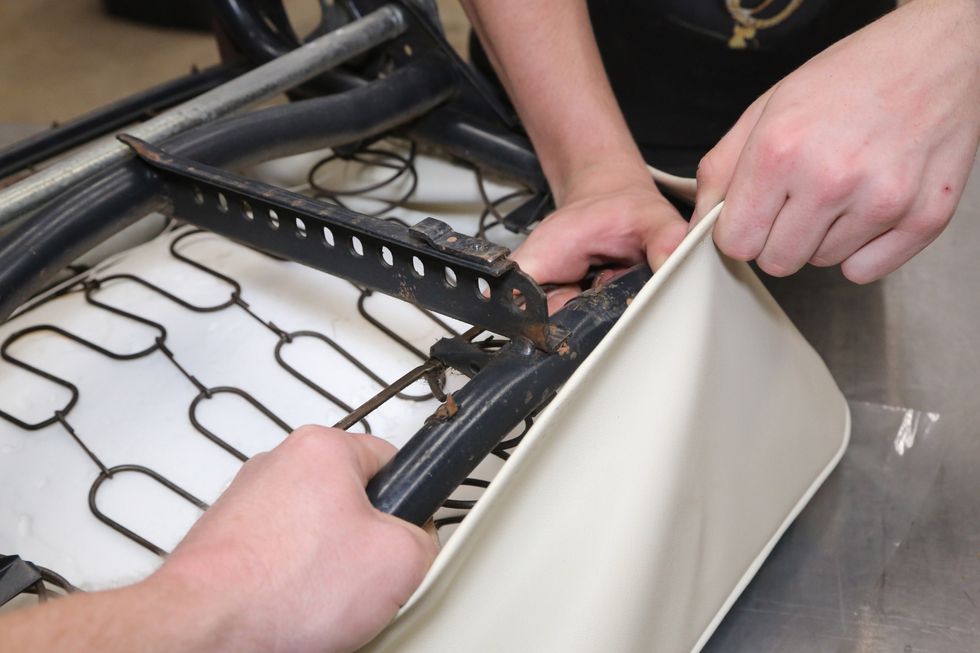
You can do this by yourself, but a second set of hands is nice to help push the springs and foam down while pulling the new seat upholstery over the frame.
Recovering Your Volkswagen’s Seats – A Step-By-Step Guide

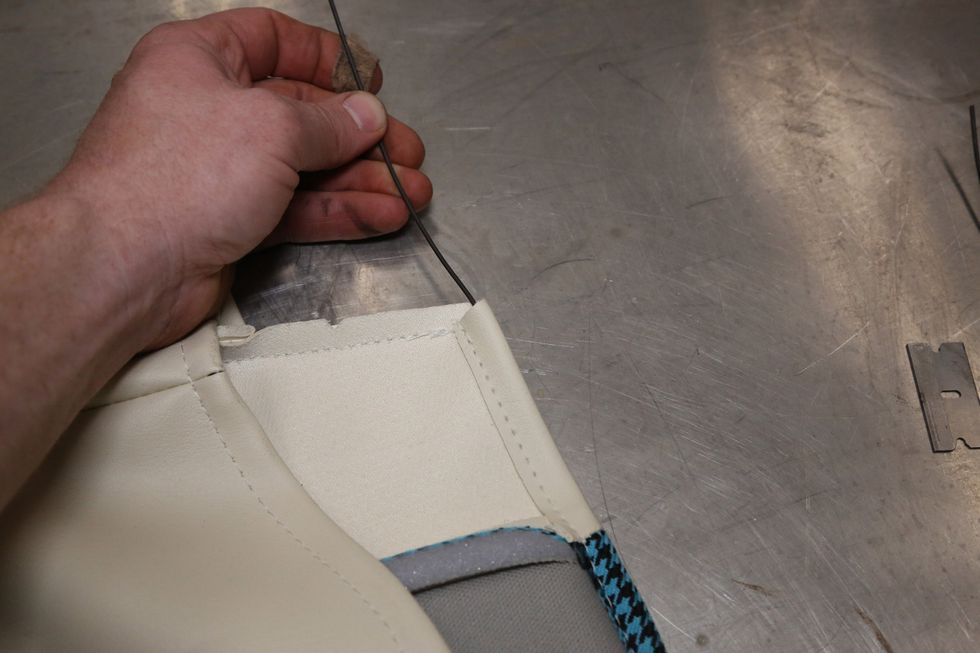
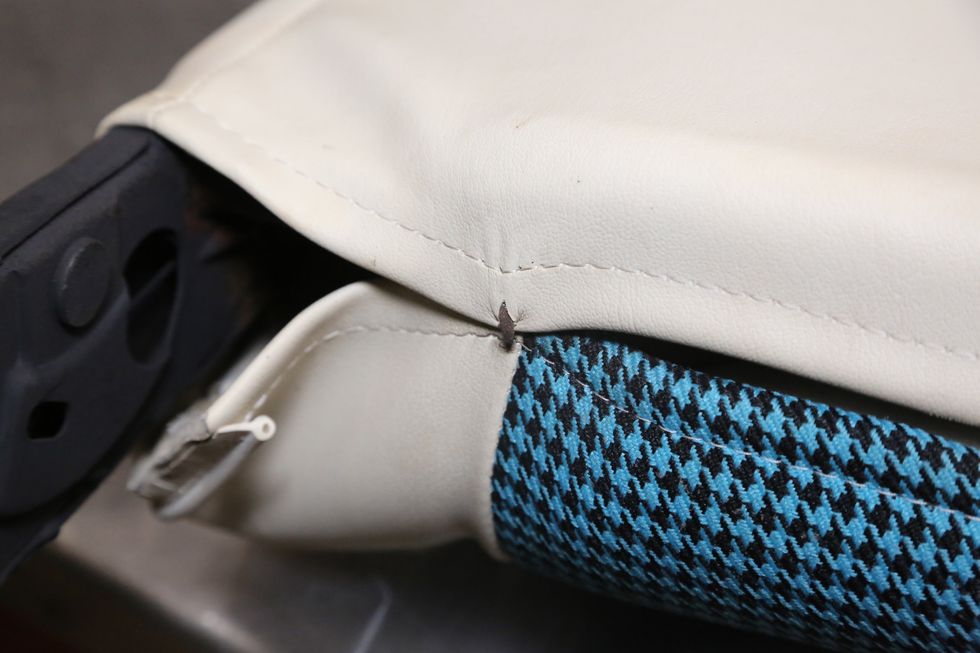
We reinstalled the listing wires and pulled the edge tight over the frame and the tabs pierce the vinyl. Make sure the tab goes between the stitching and the listing wire. The wire keeps the vinyl from tearing.
Recovering Your Volkswagen’s Seats – A Step-By-Step Guide
There are two tricky tabs (without listing wire) on the inside of the frame at the rear-side of the frame (one on each side). We carefully pulled with pliers to set it in place.
Recovering Your Volkswagen’s Seats – A Step-By-Step Guide
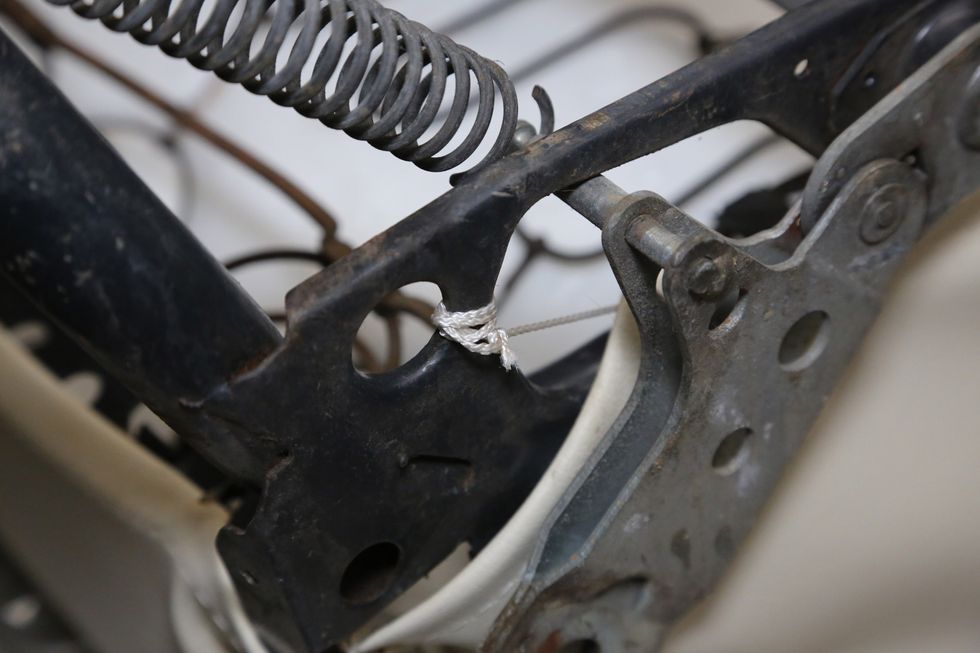
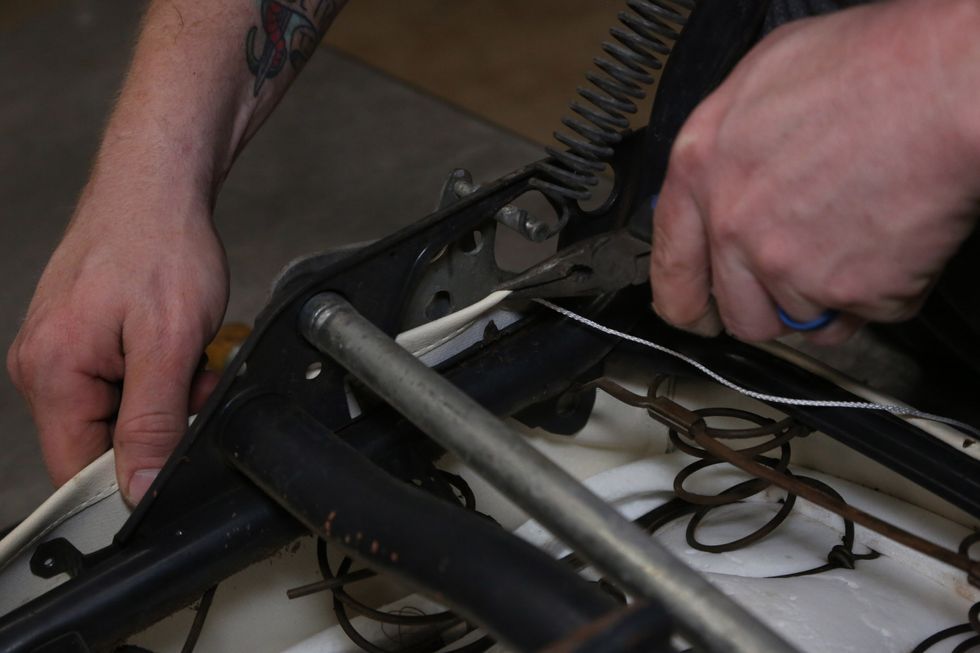
The drawstring was tied on one side and then pulled tight on the other to pull the cover tight around the perimeter, and then tied to the frame as shown. You knots don’t matter as long as they don’t come loose. We tied two finishing knots on each side to ensure it can’t come loose.
Recovering Your Volkswagen’s Seats – A Step-By-Step Guide
The seat back is the more difficult cover. The bottom front (where you back rests) folds over first, then the seat back wraps over. These use the same tabs, and ours were a little short. You need pliers on these too.
Recovering Your Volkswagen’s Seats – A Step-By-Step Guide

The flip latch just pulls off the stalk and the trim pops out of the frame.
Recovering Your Volkswagen’s Seats – A Step-By-Step Guide
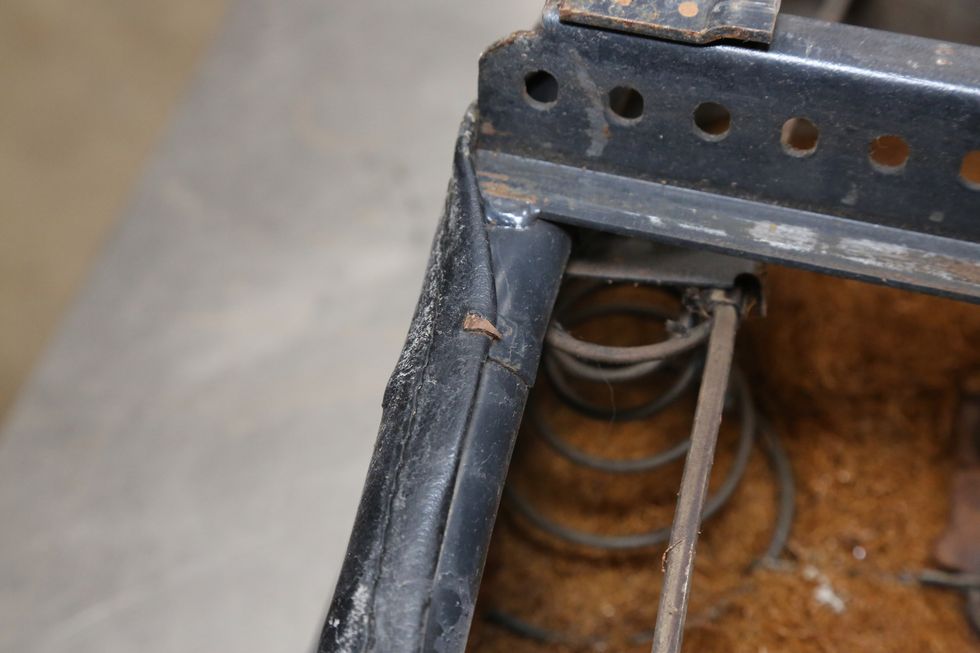
Luckily our seat frames were in really good shape despite the rat’s nest that was inside. None of the springs were damaged or rusted thin.
Recovering Your Volkswagen’s Seats – A Step-By-Step Guide
On the seat back, we added two hog rings at the very top and bottom of the foam. This is just to keep the foam from moving around while we install the cover.
Recovering Your Volkswagen’s Seats – A Step-By-Step Guide
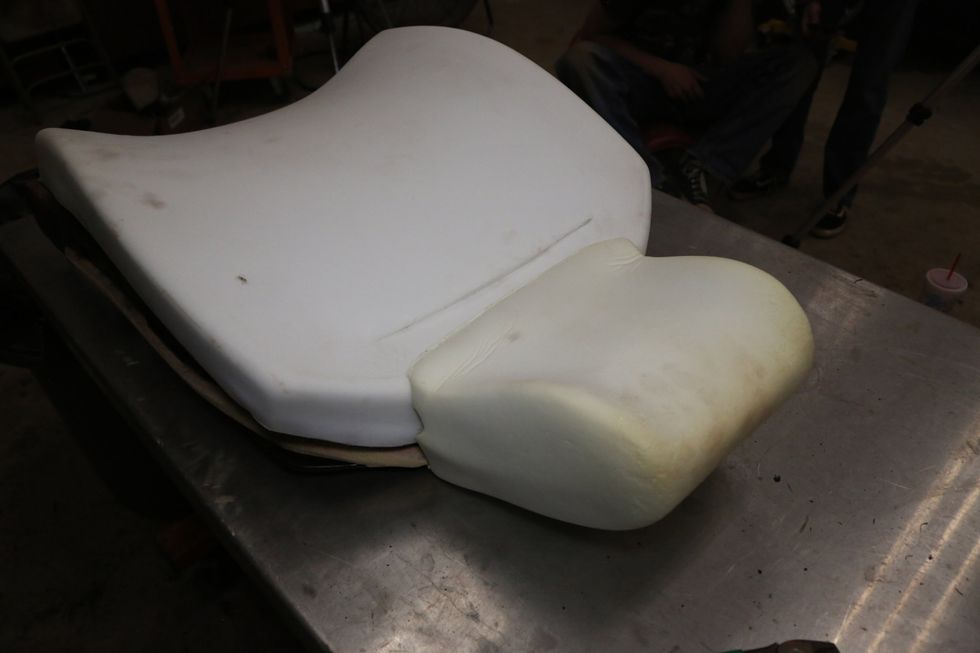
The head rest foam is a separate piece that slides over the frame and the edge goes over the back foam.
Recovering Your Volkswagen’s Seats – A Step-By-Step Guide
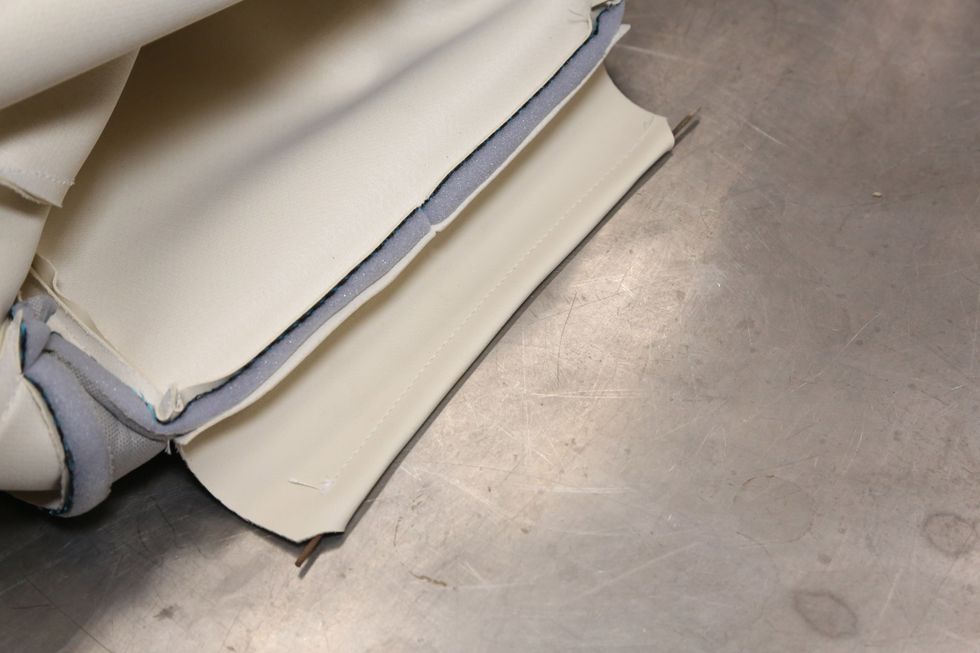
The original listing wires were rotten on the two lower flaps, so we made new ones from bailing wire. This is a thinner than the original, so these will bend a little easier. The front lower edge must be carefully cut with a razor blade allow the wire to slide into the pocket.
Recovering Your Volkswagen’s Seats – A Step-By-Step Guide
There is a 3rd wire under the headrest on the front side of the cover. We pulled the cover inside out for this.
Recovering Your Volkswagen’s Seats – A Step-By-Step Guide
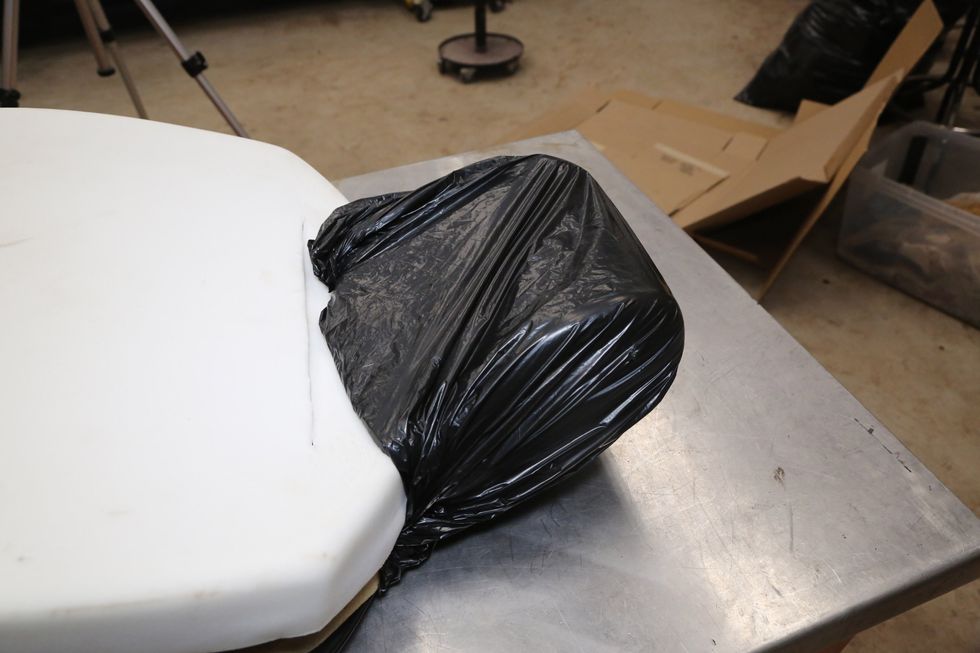
We used a plastic bag over the foam to make the vinyl slide easier. You can do this for the entire foam or just the head rest.
Recovering Your Volkswagen’s Seats – A Step-By-Step Guide
The cover was slipped over the head rest foam, and the flap we mentioned earlier was pulled through the pre-made slot in the foam. This attaches to the tabs as shown. These are the ones that got us, luckily, we didn’t bleed all over the new white vinyl and fabric. Then we rolled the rest of the cover over the new foam and frame.
Recovering Your Volkswagen’s Seats – A Step-By-Step Guide
The front flap was secured over the tabs, and then the rear was locked down and the tabs tapped down with a small mallet. You may need to adjust the position of the cover side to side to get it to look right.
Recovering Your Volkswagen’s Seats – A Step-By-Step Guide

We cut a small opening for the two seat bolts on the bottom cover. You need to move the folding arm forward, which is really stiff, so be careful. We used a long screwdriver to hold it out of the way while we cut. Then the seat back was reinstalled to the bottom.
Recovering Your Volkswagen’s Seats – A Step-By-Step Guide
The last step is locating and cutting the hole for the folding lever. Find the lever, and carefully cut to the top of the slot in the frame. If you cut too long, your new cover will be damaged and never quite look right.
Recovering Your Volkswagen’s Seats – A Step-By-Step Guide
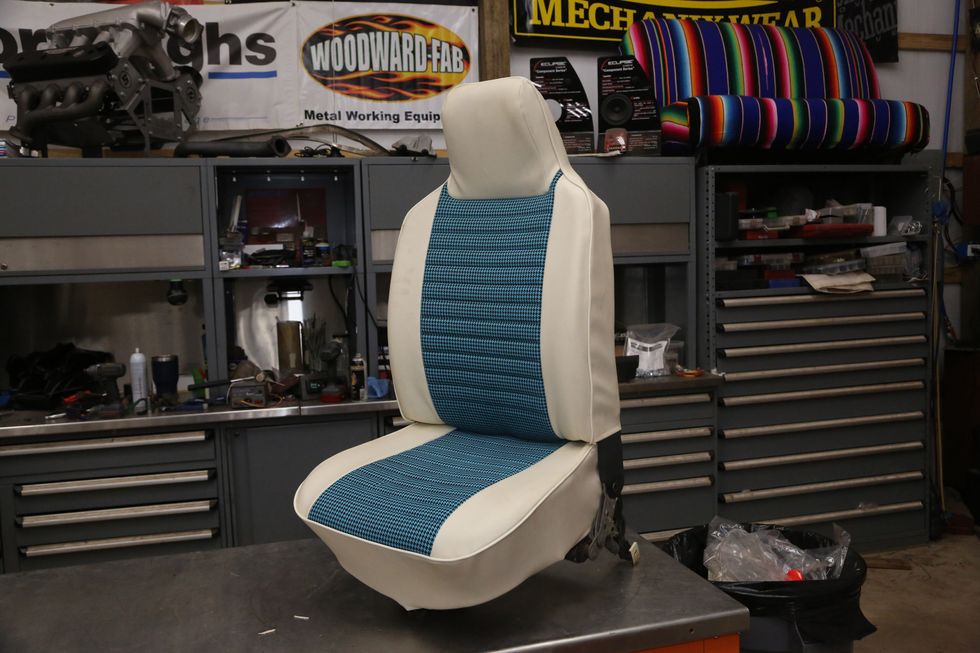
The final bucket seat looks great, and it is ready to go into the car. The wrinkles will work out naturally once the warm up a bit and set to the shape of the foam.
Recovering Your Volkswagen’s Seats – A Step-By-Step Guide
Source
TMI Products • (888) 460-0640 • tmiproducts.com
Commercials Cooperation Advertisements:
(1) IT Teacher IT Freelance

立刻註冊及報名電腦補習課程吧!
电子计算机 -教育 -IT 電腦班” ( IT電腦補習 ) 提供一個方便的电子计算机 教育平台, 為大家配對信息技术, 電腦 老師, IT freelance 和 programming expert. 讓大家方便地就能找到合適的電腦補習, 電腦班, 家教, 私人老師.
We are a education and information platform which you can find a IT private tutorial teacher or freelance.
Also we provide different information about information technology, Computer, programming, mobile, Android, apple, game, movie, anime, animation…
(2) ITSec

www.ITSeceu.uk
Secure Your Computers from Cyber Threats and mitigate risks with professional services to defend Hackers.
ITSec provide IT Security and Compliance Services, including IT Compliance Services, Risk Assessment, IT Audit, Security Assessment and Audit, ISO 27001 Consulting and Certification, GDPR Compliance Services, Privacy Impact Assessment (PIA), Penetration test, Ethical Hacking, Vulnerabilities scan, IT Consulting, Data Privacy Consulting, Data Protection Services, Information Security Consulting, Cyber Security Consulting, Network Security Audit, Security Awareness Training.
Contact us right away.
Email (Prefer using email to contact us):
SalesExecutive@ITSec.vip