When you approach a car or truck to drive, you take it in with all of your senses: you see the paint, wheels, and stance. You touch the door handle, feel the weight of the door, and settle into the interior. You twist the key and hear the engine come to life, and feel the vibration. The next step just before you set off on a drive is to look at the gauges to make sure that everything is copacetic with the vehicle… the engine is warm, the oil pressure is solid, and there’s fuel in the tank. So how disappointing is it when you get into a car or truck, you twist the key, fire the engine up and the gauges are completely inoperative? You aren’t supposed to get the silent treatment from an automobile. It’s annoying when there is no speedometer or tachometer. It’s concerning when the oil pressure gauge is flat, or there is no fuel level reading. There isn’t anything that you necessarily need to drive the car. But at the same time, you are driving without the vitals. How far will you drive before you panic and pull off for a fuel pit stop? How certain are you that the engine is happy?
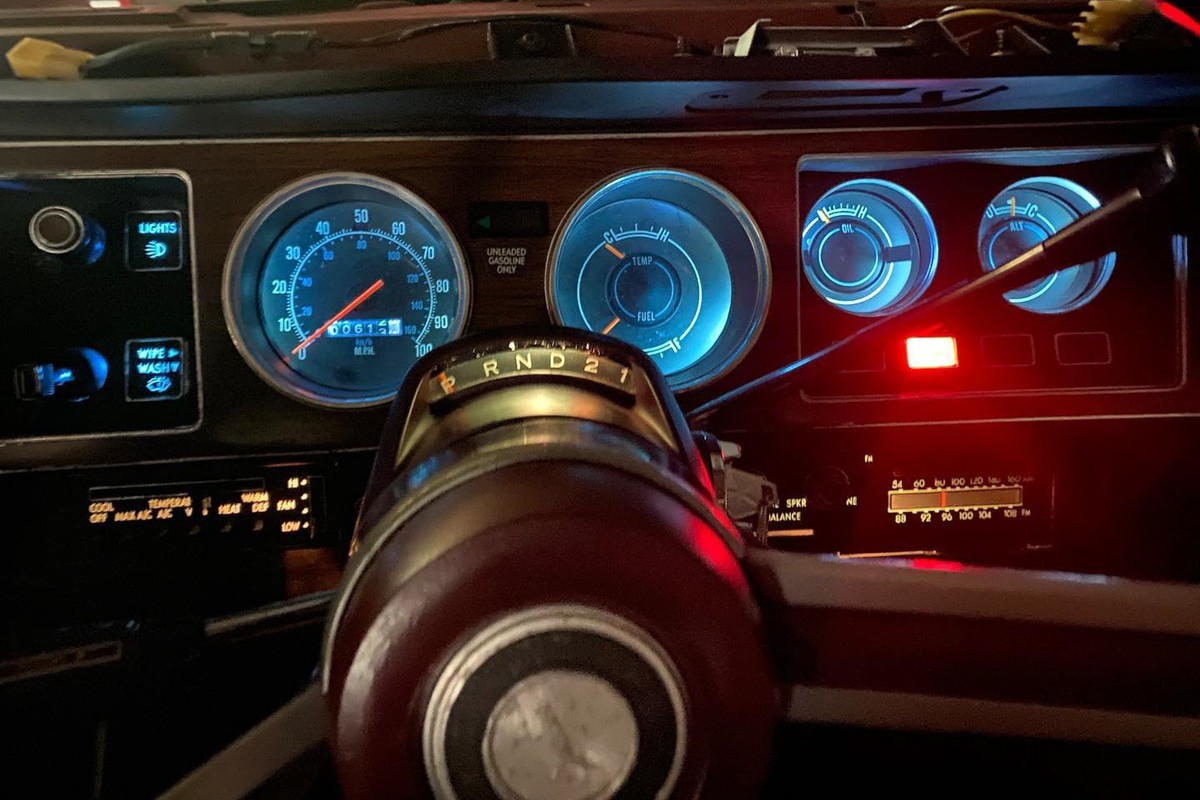
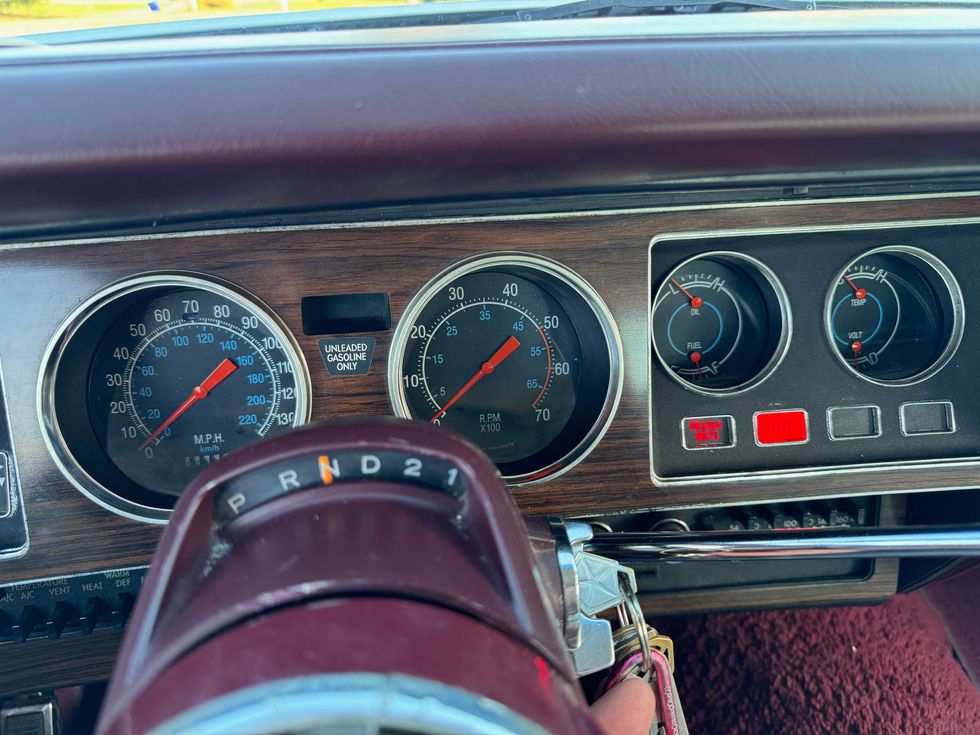
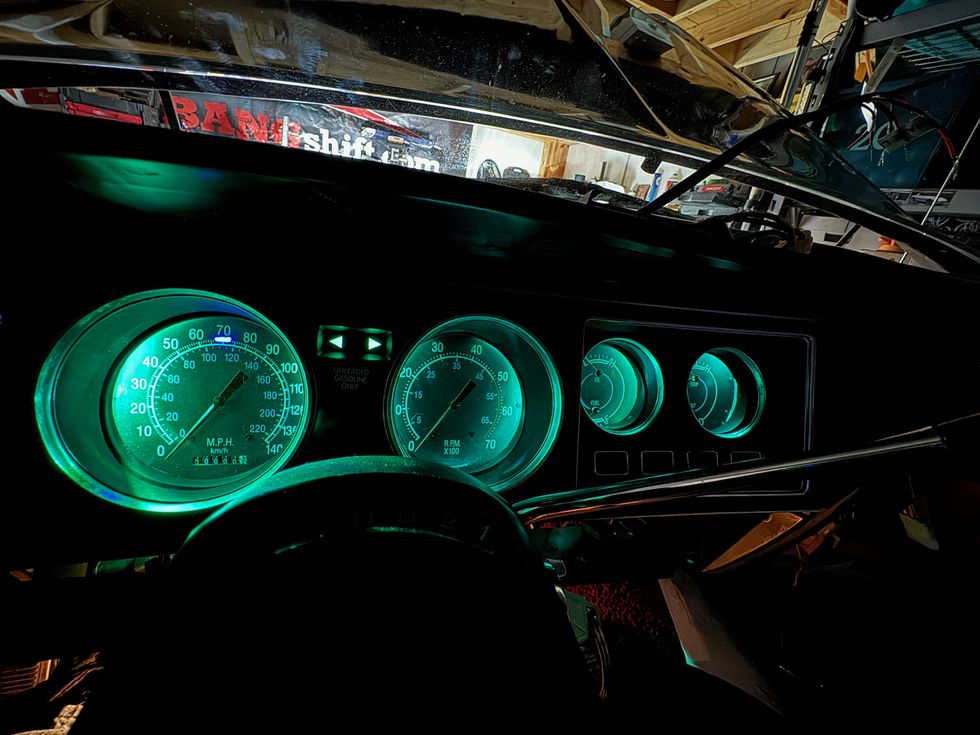
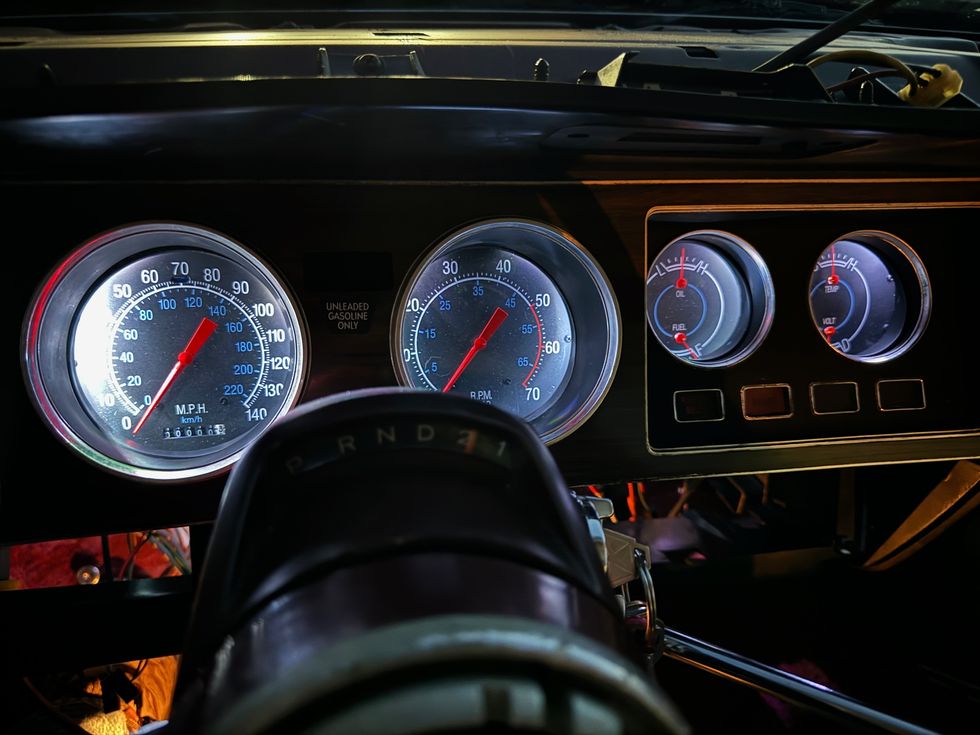
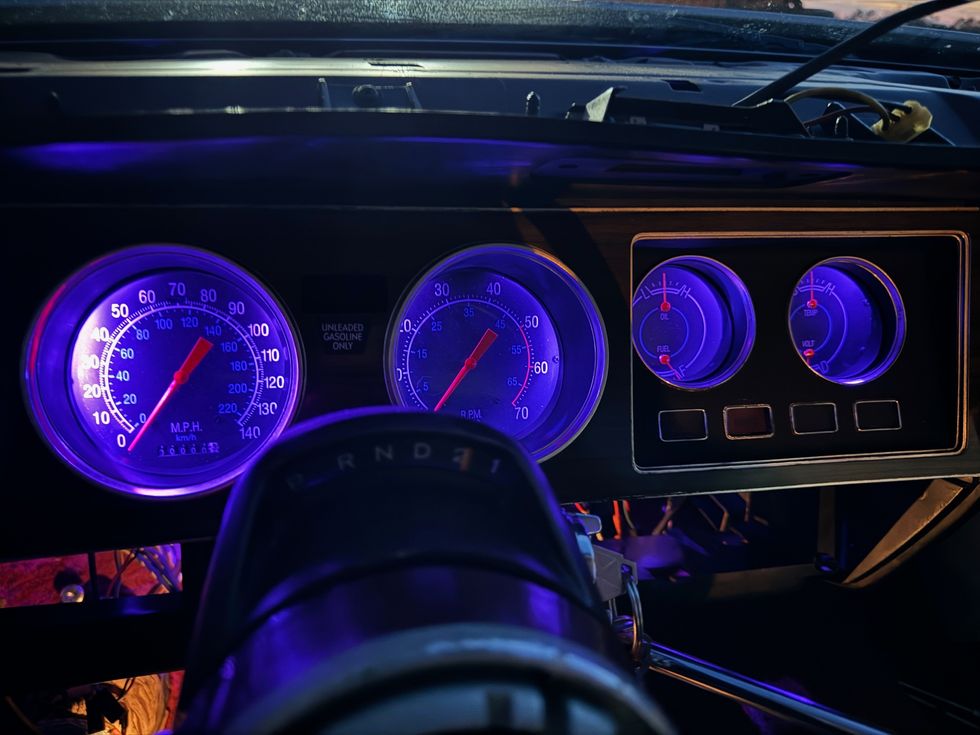
When this project started, this was the driver’s view: a bouncy speedometer, an inaccurate fuel gauge, no temperature or oil pressure readings, and an ammeter that left cause for concern. At least the aftermarket LED bulbs showed this non-information well.Photo: Bryan McTaggart
For many, the answer is easy: buy a set of aftermarket gauges, shove them into the holes of the gauge face, and call it a day. That certainly is a reasonable answer, but for some people the look of aftermarket gauges crammed into the dash face isn’t the right answer. I’m one of those people. But what if you like a clean, OEM look? For more more popular choices, like a Chevelle, a G-body Monte Carlo, or something similar, you are spoiled for choice for a gauge cluster that will fit into the factory face but would operate with modern features like an electronically driven speedometer and LED backlighting. But what if you have something a little bit off-beat?
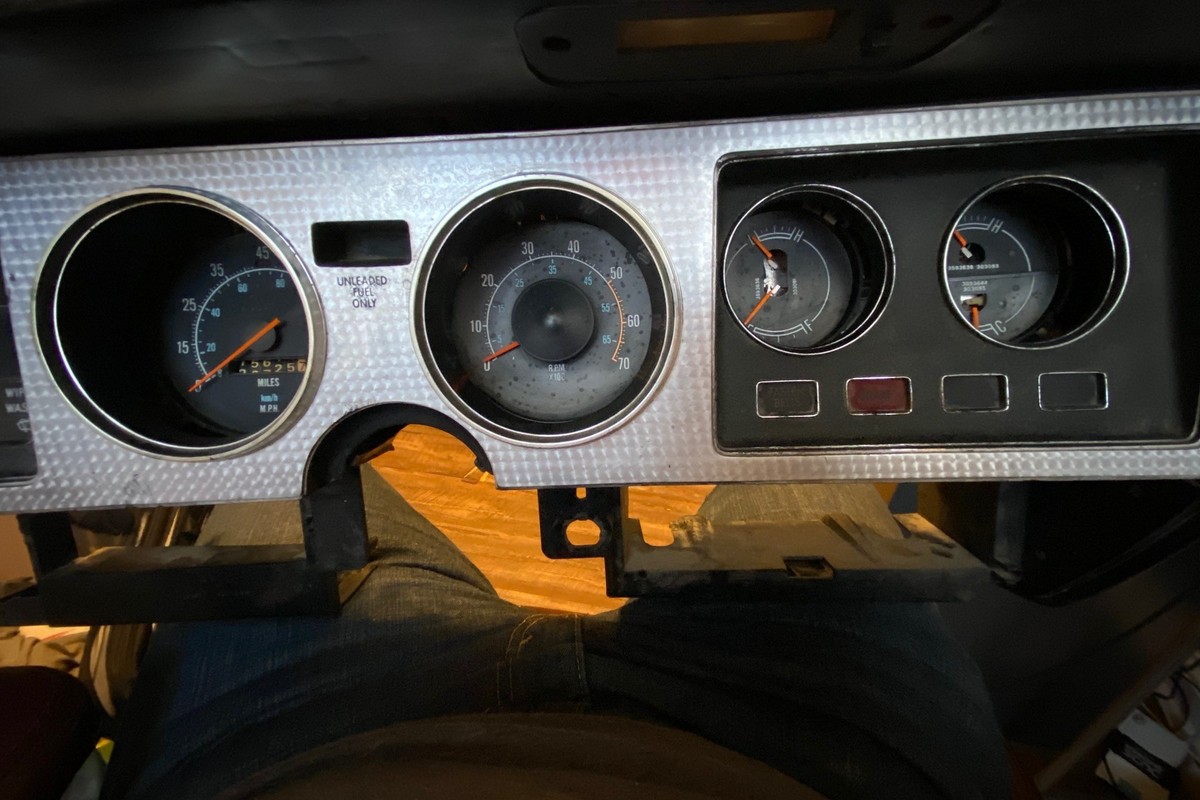
Instead of leaving the Charger without gauges, a Rallye cluster liberated from a 1978 Dodge Magnum was sourced. While this had all of the gauges we wanted, there were modifications that we wanted to make. We wanted the speedometer to read 140 MPH and we wanted to be rid of the ammeter once and for all. And if we could modify one of the two idiot lights that weren’t used from the factory, all the better!Photo: Bryan McTaggart
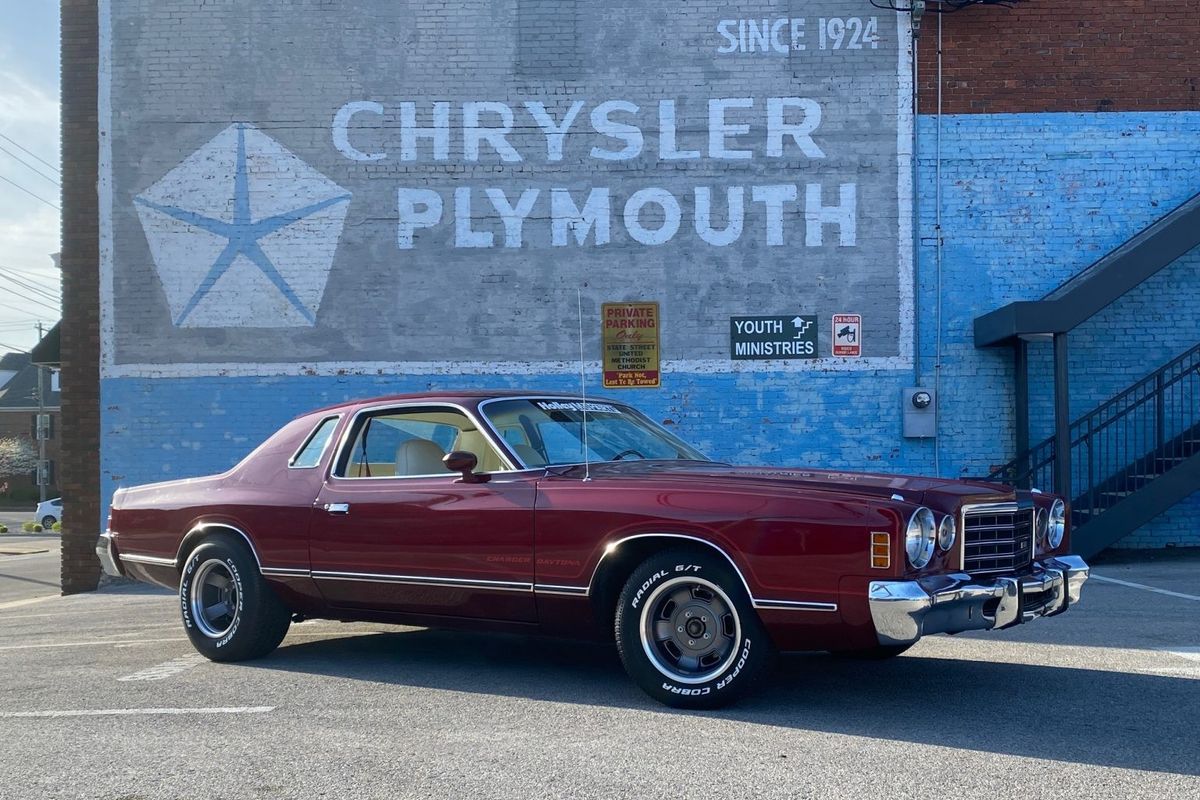
I’m the proud owner of a 1976 Dodge Charger. Yes, the personal luxury coupe that is basically a Chrysler Cordoba with a different grille, different taillights, and some other minor bits that tell you that it’s a Dodge, not a Chrysler. I’ve been working on making this late B-body Mopar Interstate-capable and earlier this summer, I met that goal by taking the car to Chryslers at Carlisle. But that doesn’t mean that I wasn’t sweating the whole trip (and not because the air conditioner doesn’t work) because I made that trip looking at the car’s second speedometer (the first one failed at a little over 57,000 miles indicated), a fuel gauge that would only show me a range from “3/4 full” to “empty” even though there was over half a tank left, and no temperature or oil pressure information whatsoever. Even more worrying was the ammeter, which was non-functional as well. The idea that I had a potential electrical failure point that is known to catch fire in certain conditions right in front of my face didn’t fill me with confidence. I wanted to have the typical muscle car instrument complement: 140-MPH speedometer, tachometer, fuel gauge, oil pressure gauge, temperature gauge and I wanted to convert the ammeter to a voltmeter. And I didn’t want to just plug in some random aftermarket gauges. I wanted to keep the original appearance.
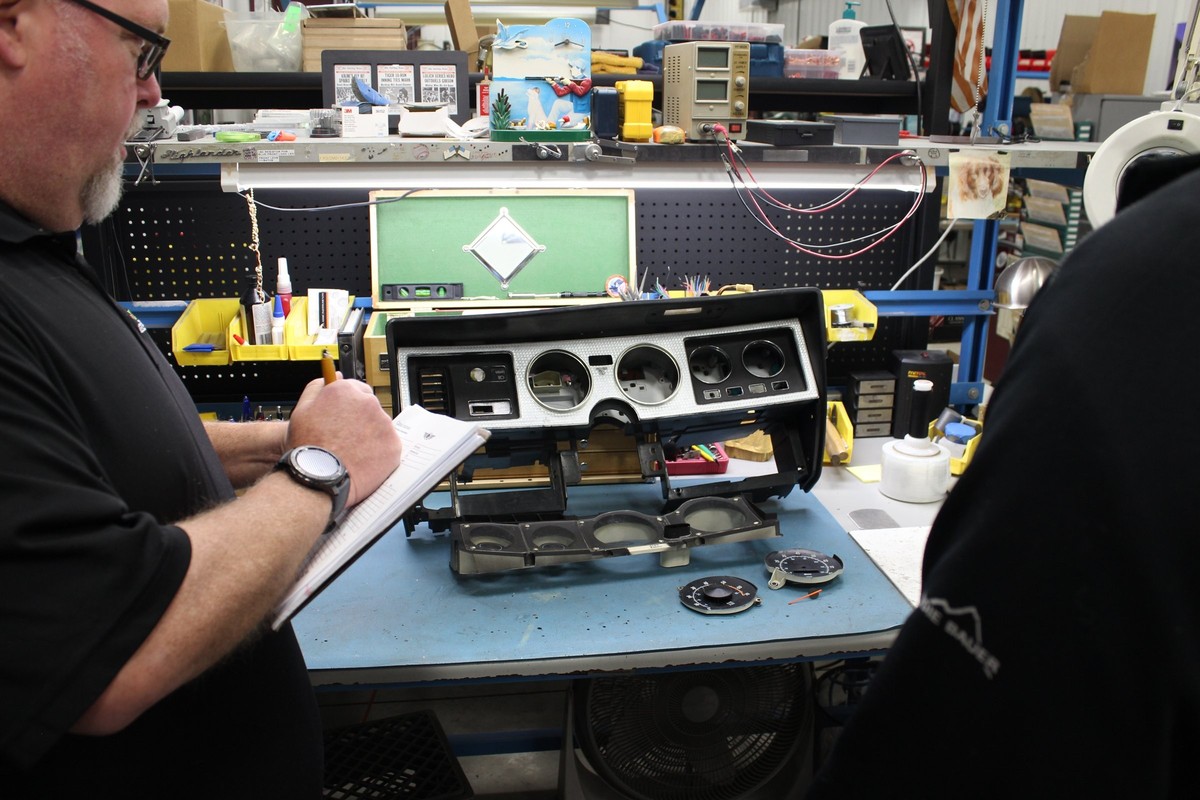
Upon receipt of the Magnum gauge cluster, the team at Classic Instruments began the process of disassembly, inspection, and compilation of photography. This not only tells the team what parts they have to work with, but allows the artists to begin to develop the draft artwork for the modifications. The buyer will see this draft during the discussions prior to putting down a 50% deposit that is required to start the project.Photo: Courtesy of Classic Instruments
My answer came in the form of Classic Instruments. The company was formed in 1977 and has been a leader in automotive gauge design. In the case of the Charger, the only answer that would check every box I had on my wish list would be their Custom Design Package service. Effectively, you remove the gauge cluster from your vehicle and ship it to Classic Instruments’ Boyne City, Michigan shop for inspection and teardown. Once they know what they will be working with, their team of engineers and artists will reach out and will work with you to determine the best course of action and to settle on the creative direction you are aiming for. Once you come to an agreement, they will create a visual representation of the finished product. This is your last chance to make modifications without any financial repercussions. Once you approve, you will put up 50% of the cost down up-front and the team will get to work. Anything else you do after this moment, you will be responsible for the cost.
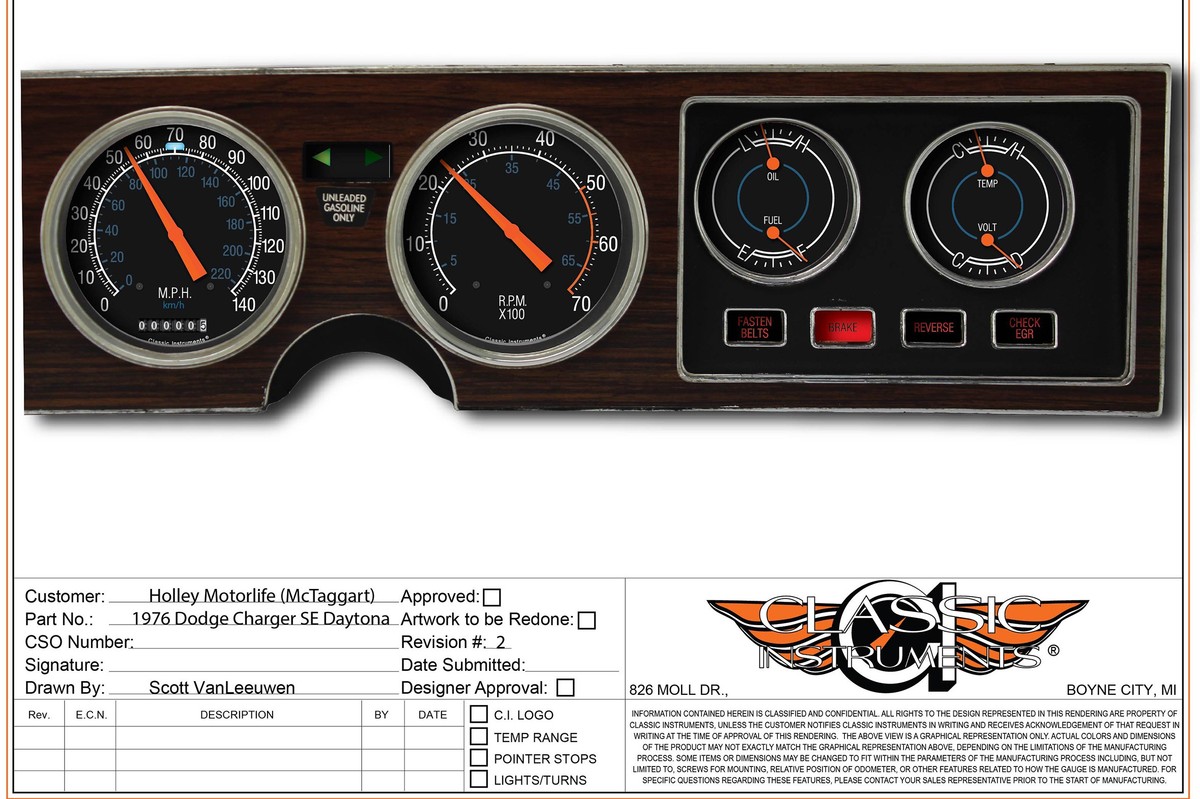
This is the final draft artwork that was approved. Here, you can see the uprated speedometer and the voltmeter conversion, but remember that note about modifying the idiot light? There are four from the factory: “Fasten Belts”, “Brake”, “Catalyst” and “Check EGR” from the factory, with the latter two not used. Because there are more modification plans in the works for this Charger, I asked if they could convert “Catalyst” to “Reverse”, which will work like the amber add-on light manual transmission-equipped muscle-era Mopars had in the dash.Photo: Courtesy of Classic Instruments
If you are wondering why you need to ship your cluster to them prior to receiving a quote, don’t feel like you’re lost. According to the team at Classic Instruments, they need to be certain that they know what they are working with. Just because you sent in a gauge cluster for a certain year, make and model doesn’t necessarily mean that every part is identical. During a production run, manufacturers can change up certain parts to a gauge cluster that most enthusiasts don’t think about. Just because you have matching gauge clusters from two different 1974 Chevrolet Camaros, for example, doesn’t mean that they both are identical.
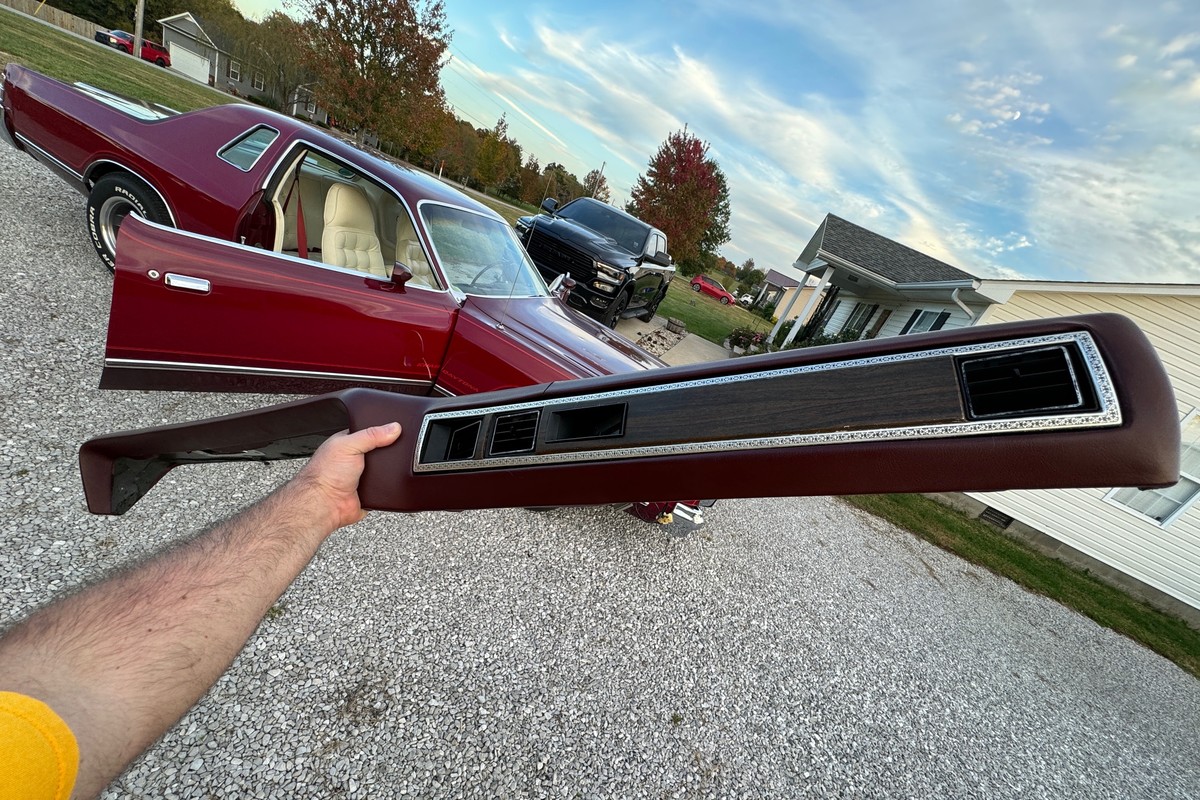
For any Classic Instruments cluster installation, disassembly of the dash is required to the point where the cluster can be removed. In the case of a 1975-’79 B-body Mopar, the deconstruction is pretty extensive as the gauge cluster occupies about one-third of the total dashboard.Photo: Bryan McTaggart
For the Charger, the process was started by locating a rare Rallye gauge cluster that had been pulled from a 1978 Dodge Magnum. Since I was going for a full gauge package, I wanted to have a full gauge cluster at the ready for the Classic Instruments team to work with. (I also wanted to keep driving the Charger while the new cluster was being built.) The Magnum cluster was complete, but desperately needed to be restored, making it the perfect candidate for the process. A couple weeks after I shipped the Magnum cluster to Classic Instruments, I got an email with a preview illustration to review. Once the final design was approved, it was just a matter of waiting until the day the delivery truck showed up in my driveway with a great big box. Understand that this won’t be a fast process…you’re asking a small team of artists and engineers to build you something from scratch, and there’s usually a line of builders waiting in the wings for projects like SEMA builds, AMBR builds, and so on. Just be patient and when the UPS truck arrives, you’ll forget all about the wait.

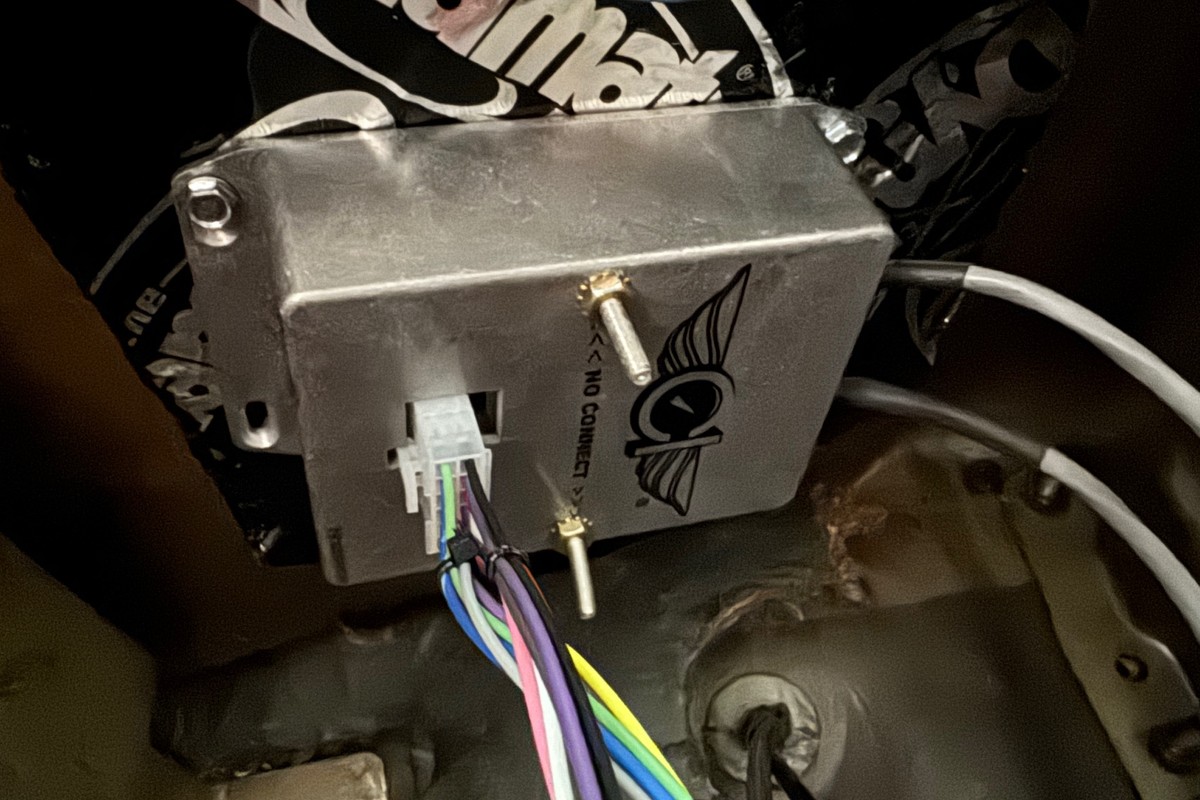
As we removed the cluster, we found something that validated our concern regarding the ammeter. The red/white and black/white wires are the two leads for the ammeter gauge and as long as the battery is connected, both have 12 volts hot at all times. The last thing we wanted to see was scorch marks on the metal contacts.Photo: Bryan McTaggart
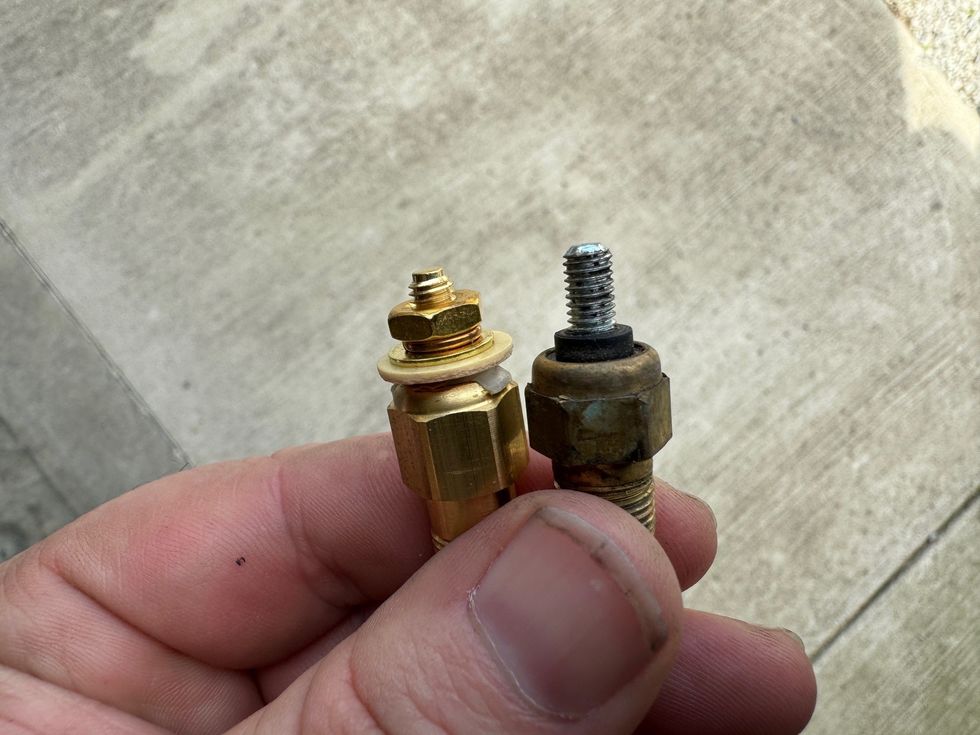
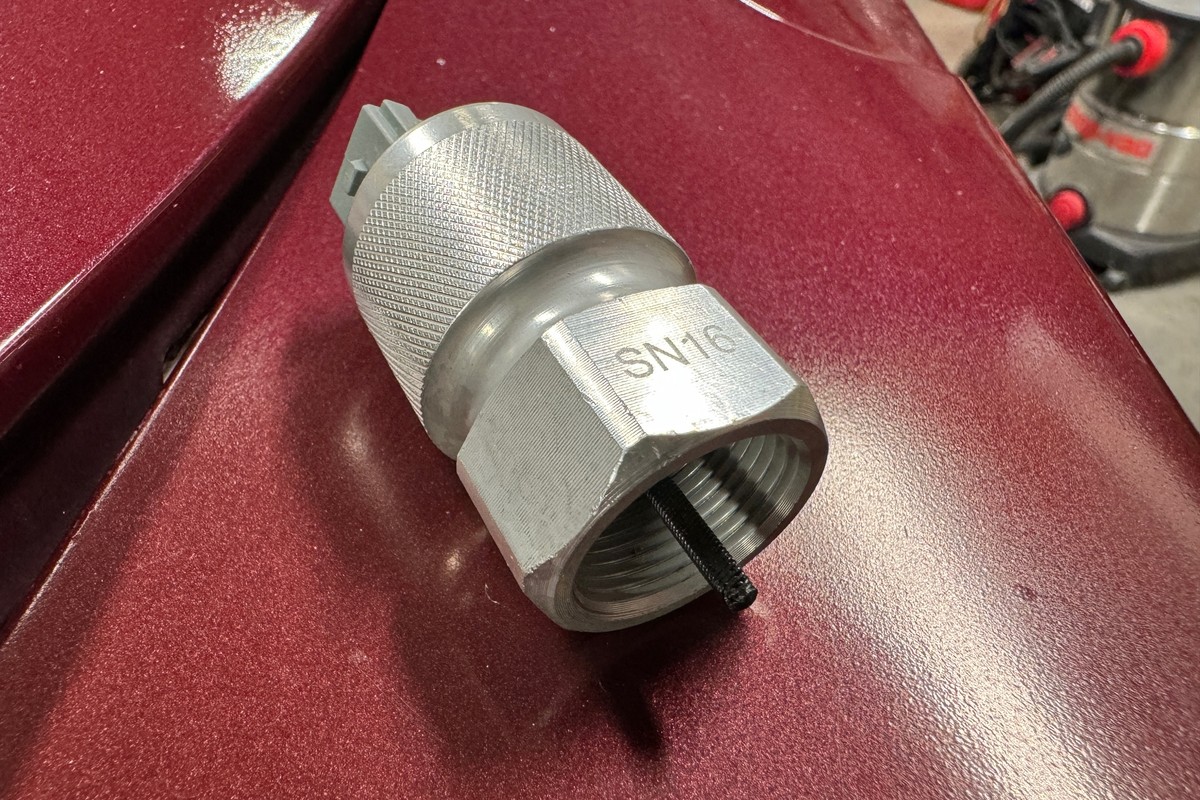
Installation of your new cluster is simple and straightforward. Classic Instruments will provide a clear wiring schematic that shows each connector and what feed or ground wire from your car needs to be hooked where. They also include connector ends and pins (and were kind enough to throw in extra, just in case). About the only thing they didn’t throw in was a factory service manual…and if you are planning on a modification like this, getting the FSM for your vehicle with schematics is a wise investment. The pins for the connectors can be secured using a set of needle nose pliers, though a set of good crimping pliers is recommended. Aside from cutting apart the original wiring connections for the new cluster, the only other required modifications involve pulling the speedometer cable and replacing the end at the transmission with the supplied SN-16 speedometer signal generator and supplied wiring bundle, mounting the signal filter for the speedometer, and finding a mounting location for the button that is used for calibrating the gauges.
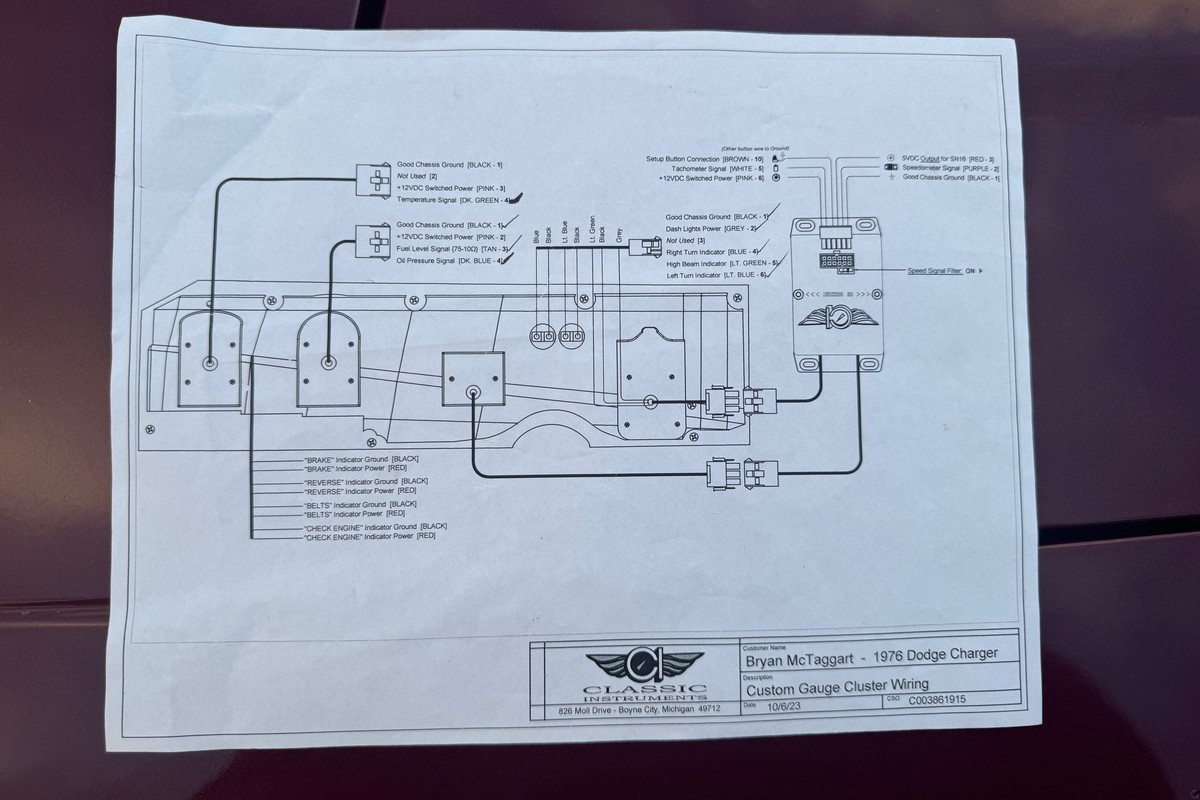
Provided with your new gauges will be a wiring schematic similar to this one. It doesn’t get any more straightforward than this. Photo: Bryan McTaggart
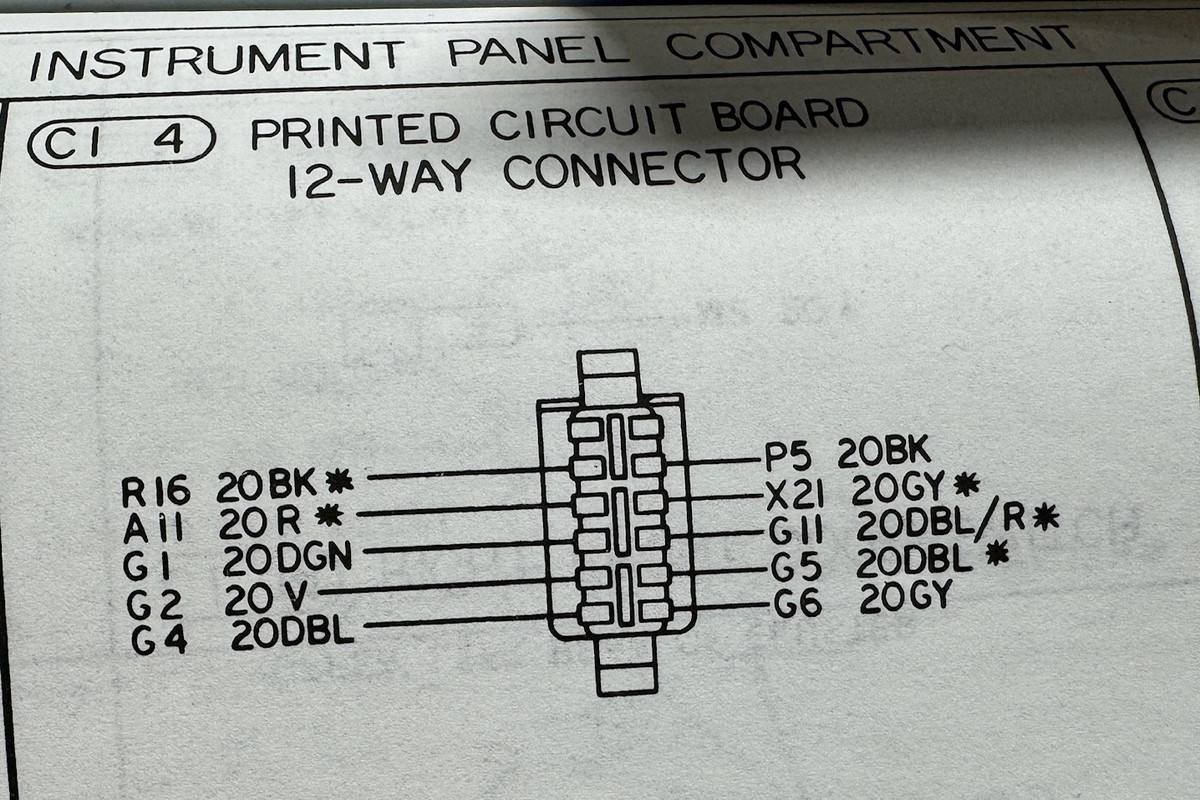
Of course, you will need at minimum a schematic for your vehicle’s gauge cluster wiring to help locate which wire goes where. In our case, we have a full library of the factory service manuals for our Charger, which proved immeasurably helpful.Photo: Bryan McTaggart
Our Charger required an additional modification to the original wiring to eliminate the ammeter circuit. This requires a re-design of the electrical current pathing between the battery, the starter relay, the alternator, and the two wires that originally connected to the ammeter gauge. This is a critical modification, because many electrical failures and electrical-based fires in pre-1980 Mopar vehicles stems from either the ammeter or the spade connectors for the two wires in the firewall bulkhead connector that are always hot when power is flowing through the system. I elected to eliminate the bulkhead connector by finding two unused spaces and carefully drilling them out before passing through 10-gauge wires to make an unbroken connection. Liberal use of inline fuses and fusible links will help stop any problems before they start.
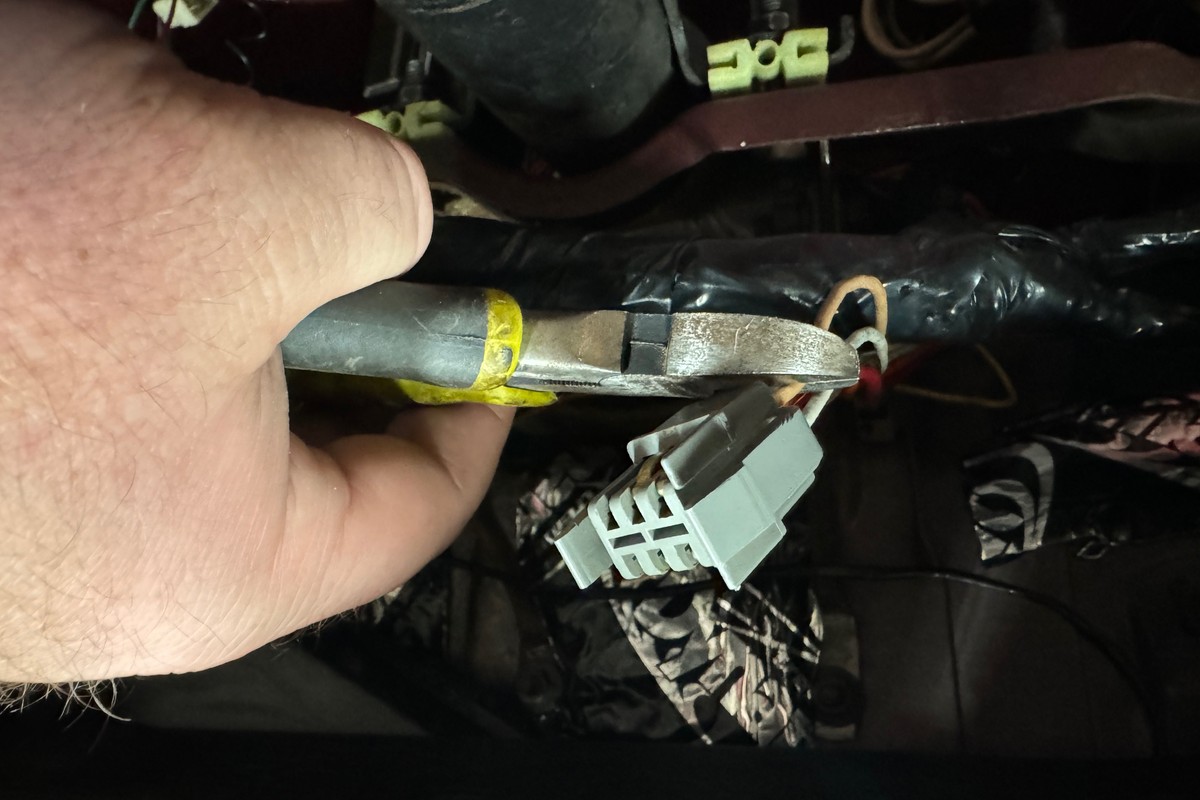
Prior to cutting any wire, be certain that you can handle this kind of work, especially if you are working on a vehicle that has nearly no aftermarket support. We had no qualms about that whatsoever, so we went wire-by-wire for the two connectors that serviced the original gauge cluster, clipping about a half-inch behind the connector itself so we would have a reference if we needed it later.Photo: Bryan McTaggart
If you find yourself sweating profusely as you maneuver the wire cutters into position for the first cut, you should probably find a reputable shop to perform the installation. However, if you are confident in your wiring skills, the gauge cluster can be as simple as a half-day installation. Unfortunately, a 1975-1978 Chrysler Corporation B-body gauge cluster is about 1/3 of the entire dash, so factoring in disassembly, reassembly, and the time spent rearraigning the wiring for the ammeter conversion added up to about twenty-five hours of effort. But the result is exactly what was wanted: functional gauges that operate smoothly and provide accurate information as the odometer keeps clicking the miles away.
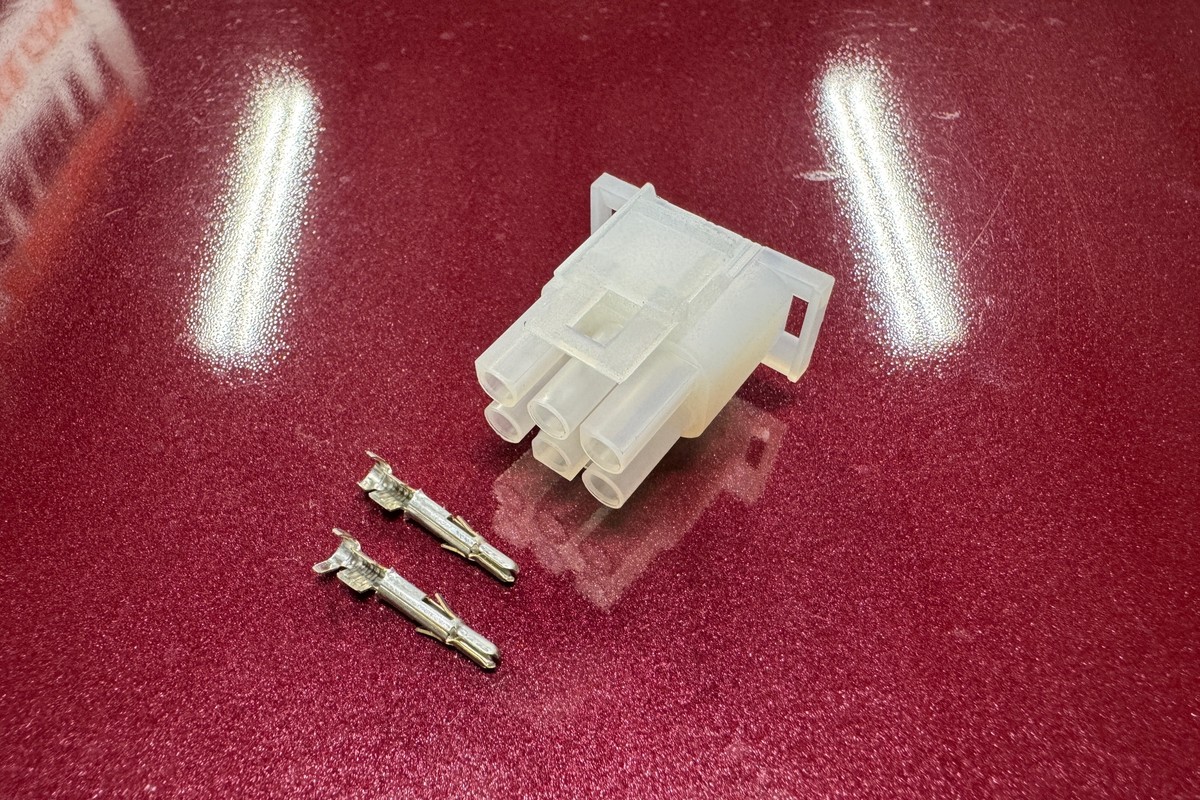
Provided with your new cluster will be connector ends and pins that will make wiring a breeze. Be sure to use a good set of crimping pliers and make sure that enough bare wire is seated into the pins. Once the pins are crimped onto the wire, simply push that wire into the designated position in the block, per the schematic.Photo: Bryan McTaggart
Electronic Speedometer Installation