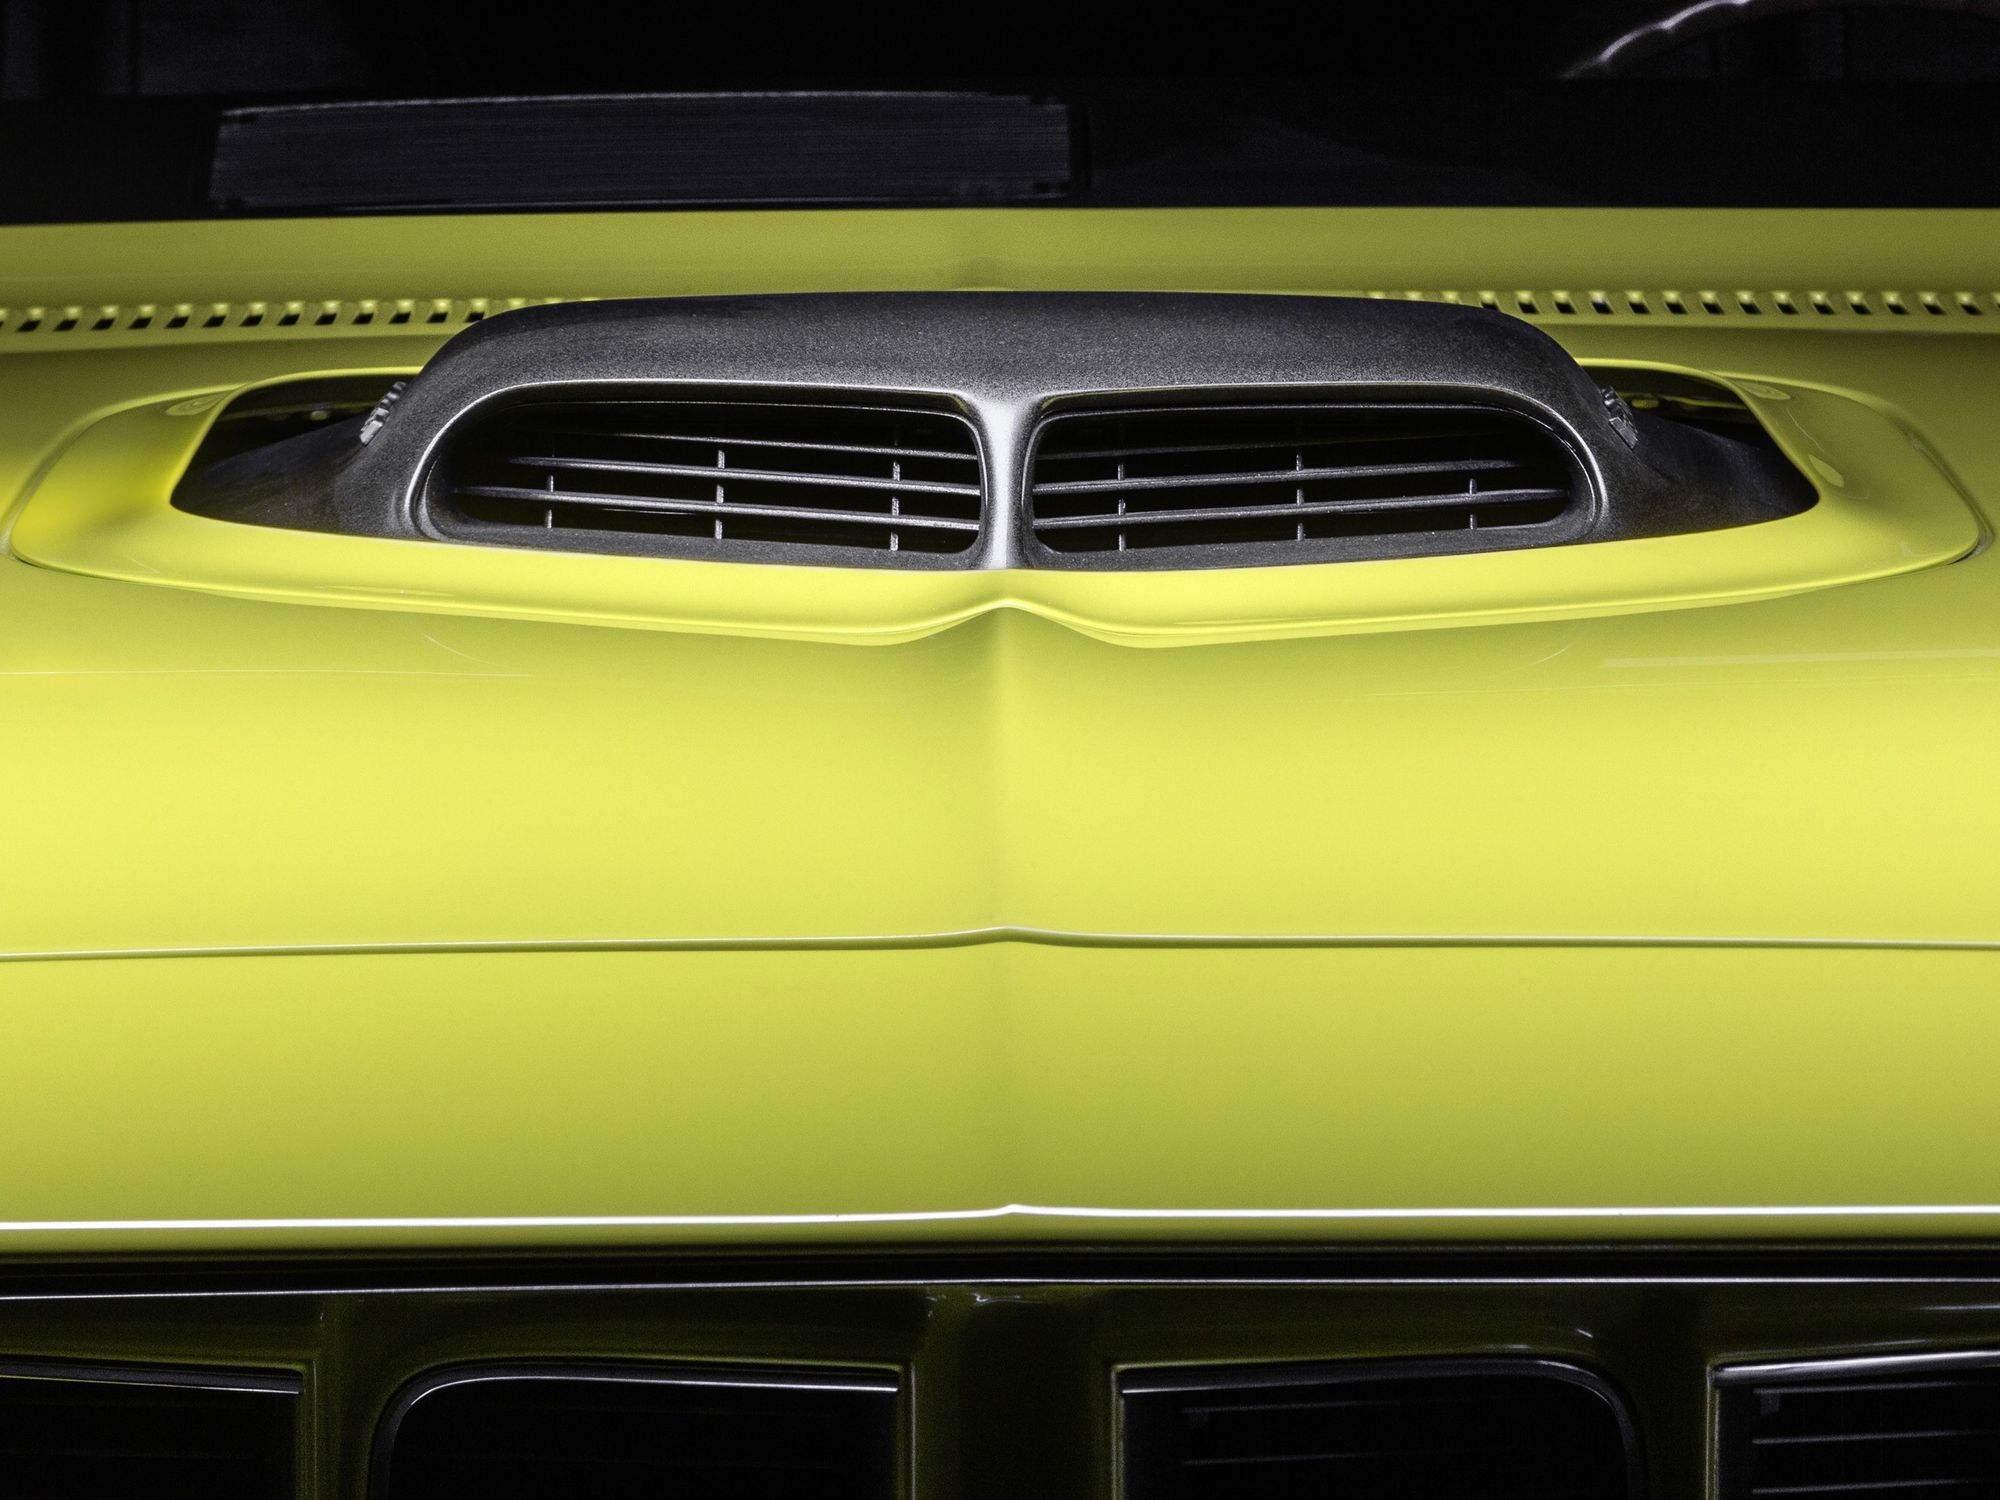
During the muscle car era of the 1960s and early 1970s manufacturers came up with some clever ideas to enhance their vehicles. Horsepower was king, but the stylistic solutions employed to separate the base models from their bigger cubic-inch performance-oriented models on the salesroom floor came to life in design departments. Those designs were then pushed by advertising agencies. Much of that differentiation employed the use of bright colors, stripes, wheels, and scoops. Arguably one of the most creative companies was Chrysler, with their Plymouth and Dodge line of performance cars. While some of the solutions employed were purely visual, others had a practical performance application baked into their design. We’re going to focus on one of Chrysler’s most iconic fresh air scoops, the Shaker, which was available on Plymouth ‘Cuda and Dodge Challenger R/T models in 1970 and 1971. If your E-body had option code N96 stamped on the data plate, or noted on the vehicle’s broadcast sheet, then it was equipped with what was initially called in some early sales brochures as the “Incredible Quivering Exposed Cold Air Grabber” before being changed later on to just “Shaker.”
For the individual that has one of these Shaker packages installed on their vehicle and is looking to do a full restoration on the various components utilized, there are different paths that can be taken. Some may opt for a simple sand and respray, while those looking to do a concours level restoration where the initial factory build process is replicated requires much more effort to pull off. As we focus on the complete makeover of the most visible component, the Shaker bubble, we turn to one of the premier shops that has mastered this technique, Mike Mancini’s American Muscle Car Restorations (AMCR), to show us how they tackle this complex process. Over the years they’ve done numerous OE Gold Certified restorations on Shaker-equipped cars, which has given them a wealth of information. Their approach has been to collect and document the information that has been gathered from a broad range of original vehicles to duplicate that initial build process. We will look at the steps in their process, but before we dive in, we’re going to give you some information on how these parts were manufactured for Chrysler because there is a direct correlation on how they are correctly restored.
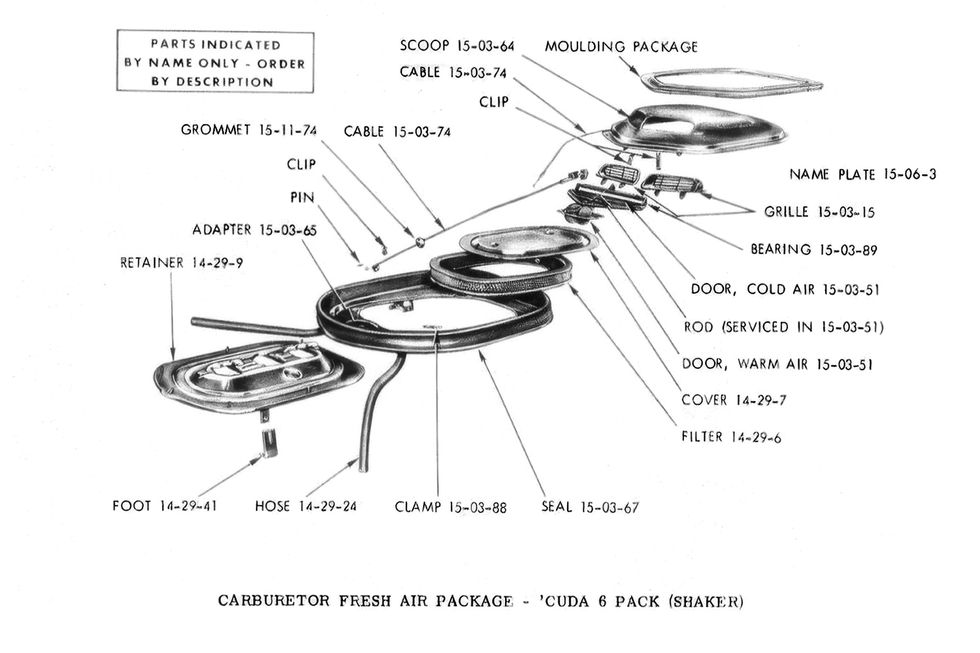
The first misconception that some individuals have on items like this is that they were fabricated or assembled in house by Chrysler. The reality is that the Shaker fresh air package was farmed out to Fram in Chatham, Ontario for final assembly. As shown in the parts manual, the illustration shows the complexity of the entire assembly which Fram was responsible for delivering to the Hamtramck and Los Angeles assembly plants. The parts that made up this package were sourced from several vendors. Fram in Stratford, Ontario, a subsidiary of the parent company, was responsible for the fabrication of the various base plates, which were designed to be mounted on a variety of different engine and carburetion options, and an outer adapter ring. They also manufactured the various air cleaner lids, filters, and the air doors fitted to the bubble, however, the rest of the parts were sourced from several US and Canadian suppliers. These assemblies, when shipped to both plants, were turnkey – right down to the emblems, ready to be installed. They were shipped on bedsteads that held sixty units each.
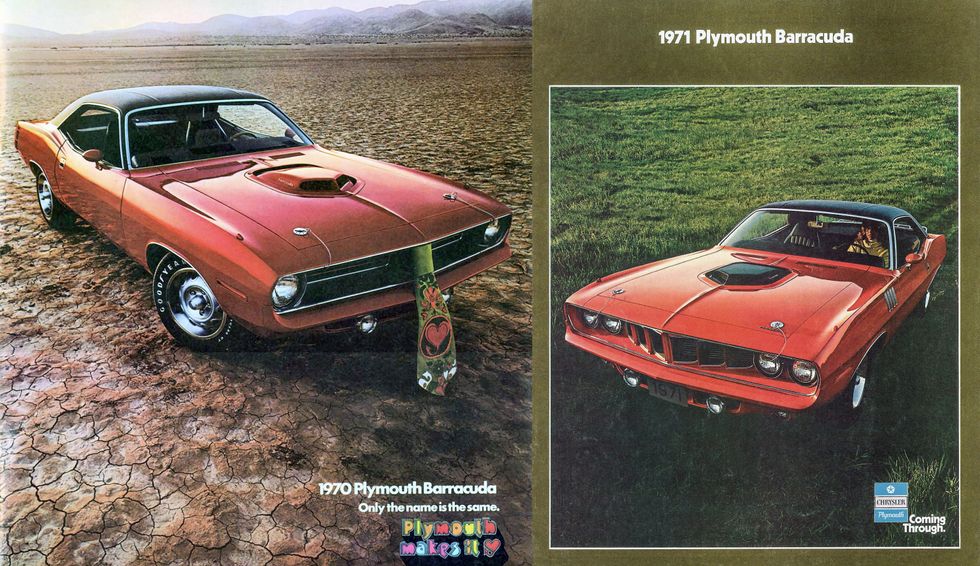
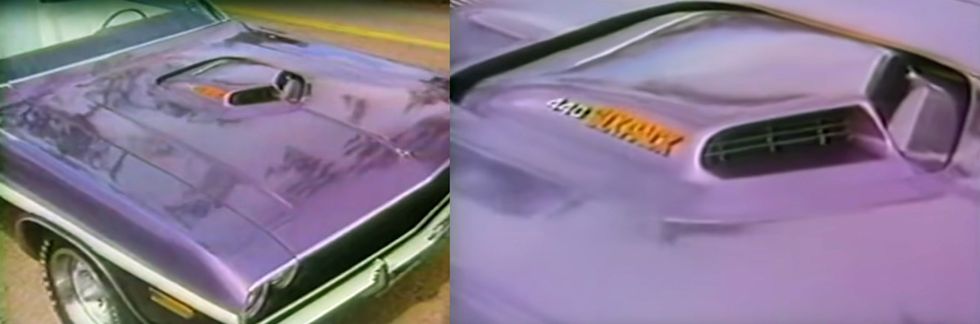
Chrysler’s early promotional material for the 1970 Barracuda line, which included a Hemi-equipped ‘Cuda on the cover of the sales brochure showed the Rallye Red bubble prominently featured. In 1971, the sales brochure had a 340-equipped ‘Cuda on the cover with a black Shaker bubble. During the two-year production of Shakers only the black, silver, and red finishes were approved by Chrysler and showed up in internal Fram literature. Part of the overall assembly process required them to paint the bubbles and the first batch sprayed in 1970 were done in Argent Silver. This was a task that Fram was not equipped to perform due to the requirements needed to spray the textured paint, and the adhesion problems encountered because of the bubble’s material composition. Chrysler executives also asked for a few bubbles to be painted Rallye Red for use in their print materials and television ads, and there were very few installed and sold on cars early in the production run. It is rumored that Chrysler opted to discontinue the Rallye Red option because of sun glare issues due to the bubble’s curvature.
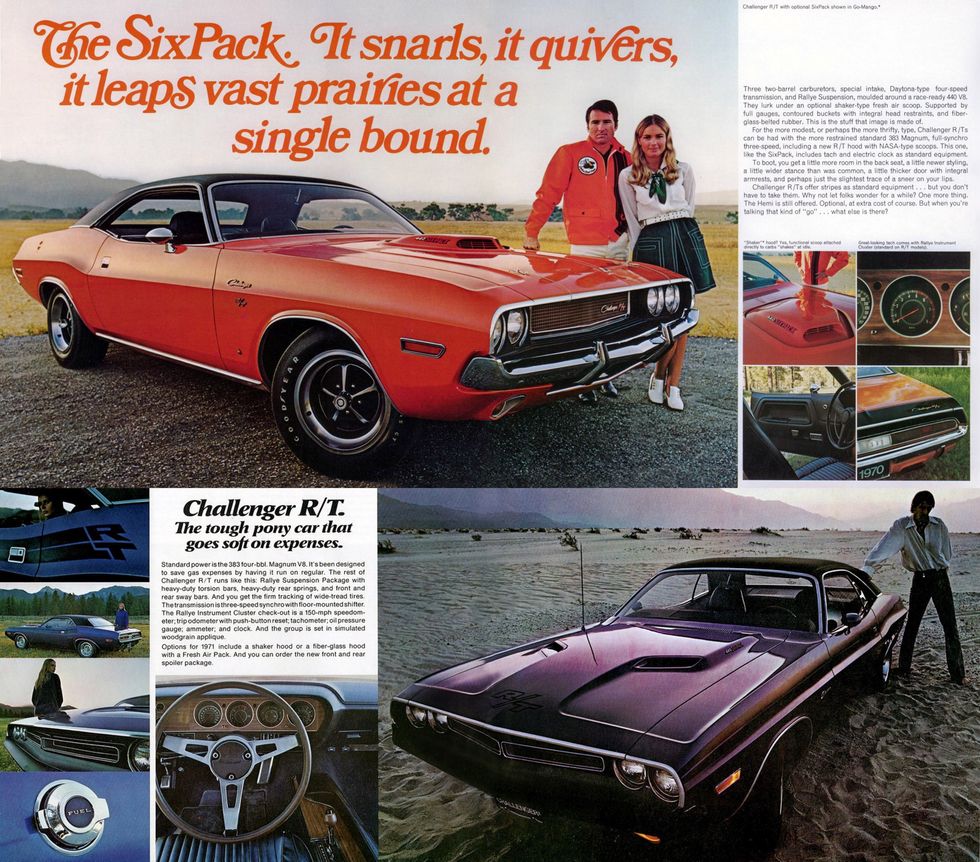
The Shaker assemblies for the Dodge Challenger were identical to the ones fitted on the ‘Cuda (except for the emblems) and covered the same engine and carburetion options for both years. The sales brochure for the 1970 Challenger showed a Go-Mango 440 Six Pack-equipped car with a bubble that was color-matched to the body. There was also a TV commercial with a Plum Crazy 1970 Challenger 440 Six Pack convertible with a color-matched bubble. Fram was asked to paint a few bubbles in Go-Mango for their print materials, but no information is available on the Plum Crazy bubble. Neither of these colors show up in internal Fram documentation as being available for production. Unlike the ‘Cuda, the Challenger Shaker option was fraught with issues due to what is believed to be a design flaw in the hood, which forced Chrysler to suspend its production. A completed batch of Argent Silver Shaker assemblies that were sent to the assembly plants were shipped back to Fram due to the halt on hood availability. Once the design issues were resolved and the Shaker option was once again on the table late in the 1970 model year, the Argent Silver Challenger bubbles that Fram was sitting on were shipped back to the assembly plants and used until they ran out, at which point the Organosol Black was phased in during the 1971 production run.
The Shaker assemblies for the Dodge Challenger were identical to the ones fitted on the ‘Cuda (except for the emblems) and covered the same engine and carburetion options for both years. The sales brochure for the 1970 Challenger showed a Go-Mango 440 Six Pack-equipped car with a bubble that was color-matched to the body. There was also a TV commercial with a Plum Crazy 1970 Challenger 440 Six Pack convertible with a color-matched bubble. Fram was asked to paint a few bubbles in Go-Mango for their print materials, but no information is available on the Plum Crazy bubble. Neither of these colors show up in internal Fram documentation as being available for production. Unlike the ‘Cuda, the Challenger Shaker option was fraught with issues due to what is believed to be a design flaw in the hood, which forced Chrysler to suspend its production. A completed batch of Argent Silver Shaker assemblies that were sent to the assembly plants were shipped back to Fram due to the halt on hood availability. Once the design issues were resolved and the Shaker option was once again on the table late in the 1970 model year, the Argent Silver Challenger bubbles that Fram was sitting on were shipped back to the assembly plants and used until they ran out, at which point the Organosol Black was phased in during the 1971 production run.
Mopar Shaker Scoop Restoration – Process
The bubble that we will be using to illustrate the AMCR process is from a 1971 Plymouth ‘Cuda equipped with a 340. This bubble was for the most part complete and in excellent condition. It’s from an original Shaker car that was built on October 12, 1970, and was painted in PPG Organosol Black lacquer, which was the only color available for a bubble on ‘Cudas built for the 1971 model year. When AMCR restores a Shaker bubble, they will have the correct black or silver finish applied in the original PPG lacquer.
Mopar Shaker Scoop Restoration – Process
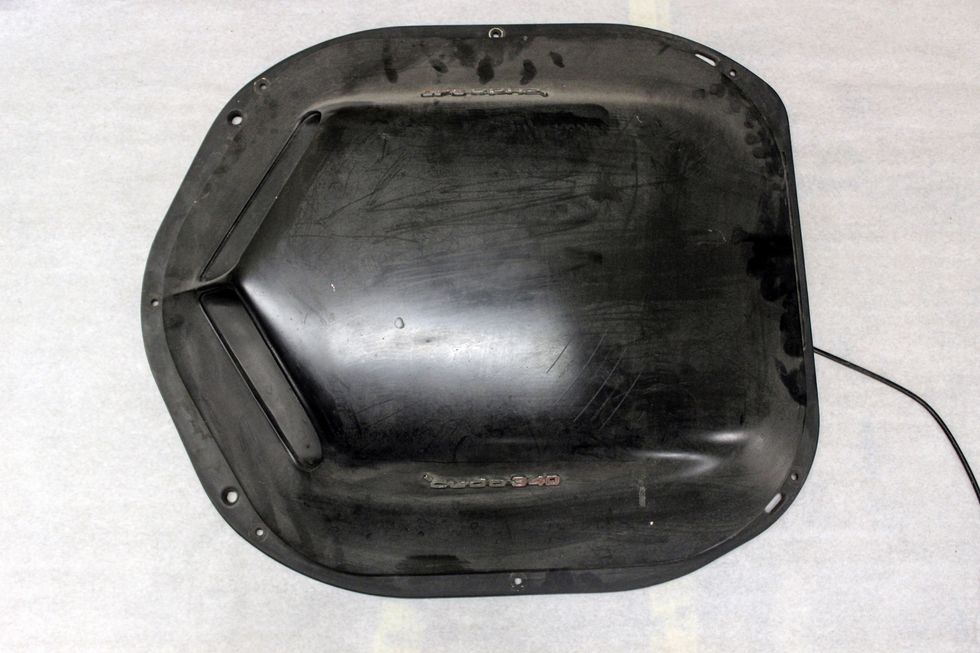
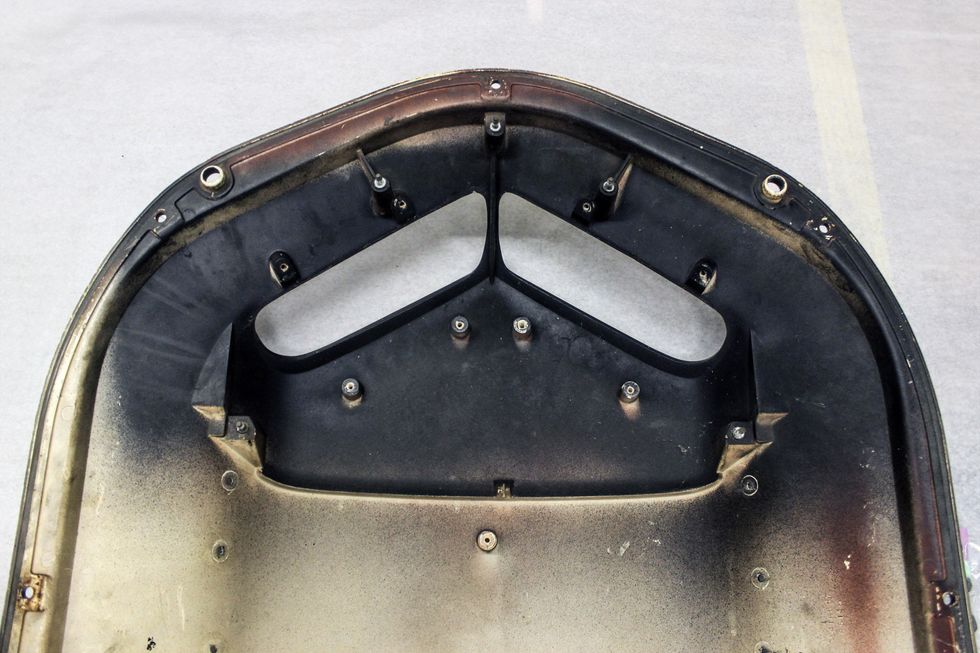
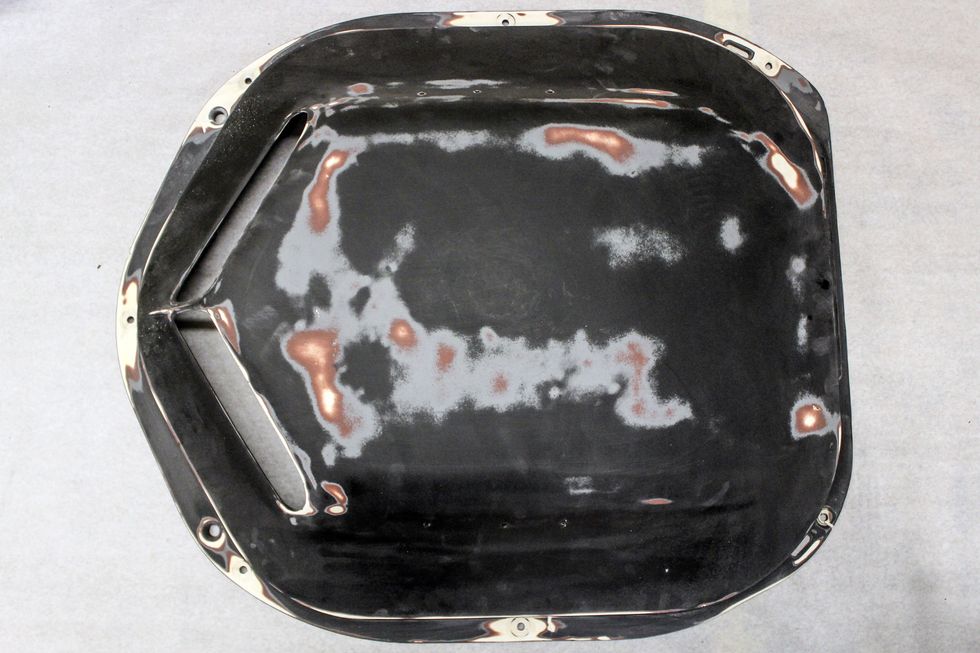
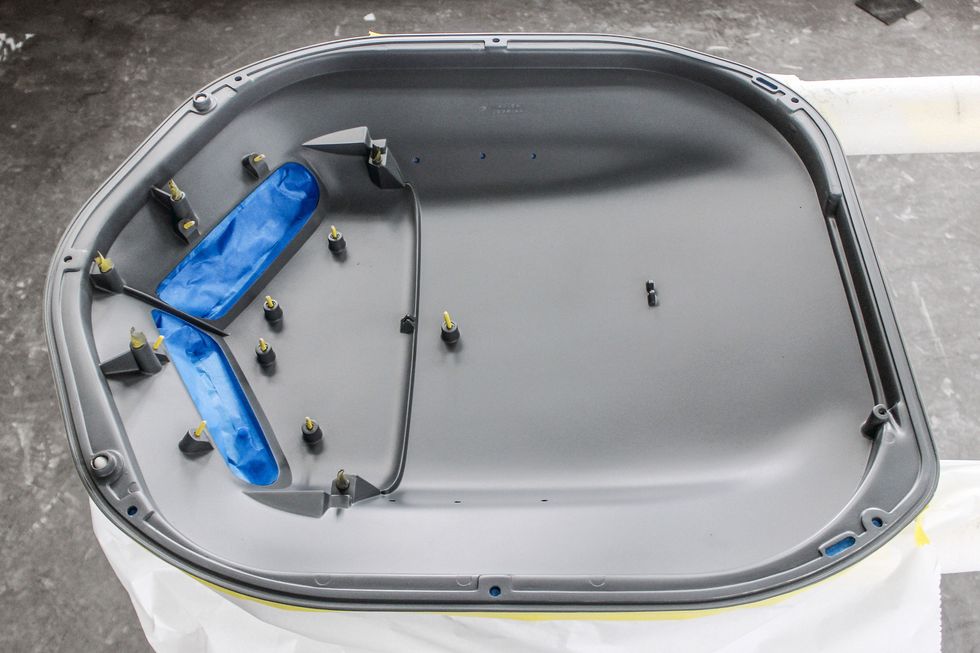
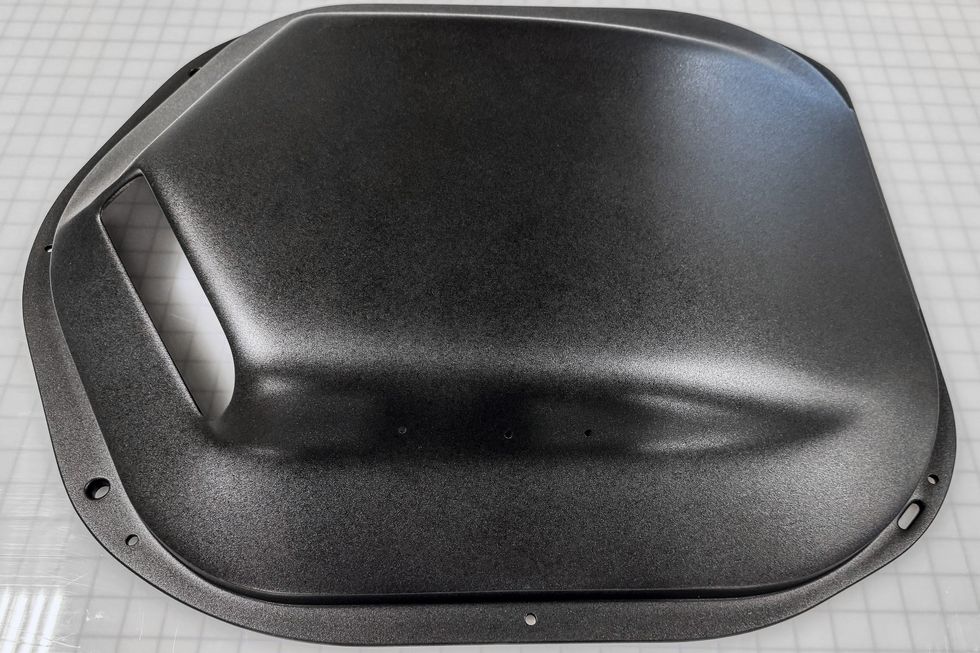
The underside of these bubbles is often the part that many shops will overlook and not address when they are doing a restoration. It is also the one aspect that sheds light on the assembly process and the one that is most difficult to get right. The bubbles were produced for Chrysler in Ontario and then were shipped to Fram as a bare part. Chrysler had these parts made using a reaction injection molding (RIM) process because of the underhood demands due to heat and fumes. The RIM process involved the mixing of several liquid components under pressure in a two-part mold that was then heat cured. The finished product had an off-white finish that while very resistant to the elements also tended to discolor and darken, which can be seen on this bubble. This factor, along with the overspray pattern shown on the bubble’s interior surface is meticulously reproduced by AMCR in their restoration process.
Mopar Shaker Scoop Restoration – Process
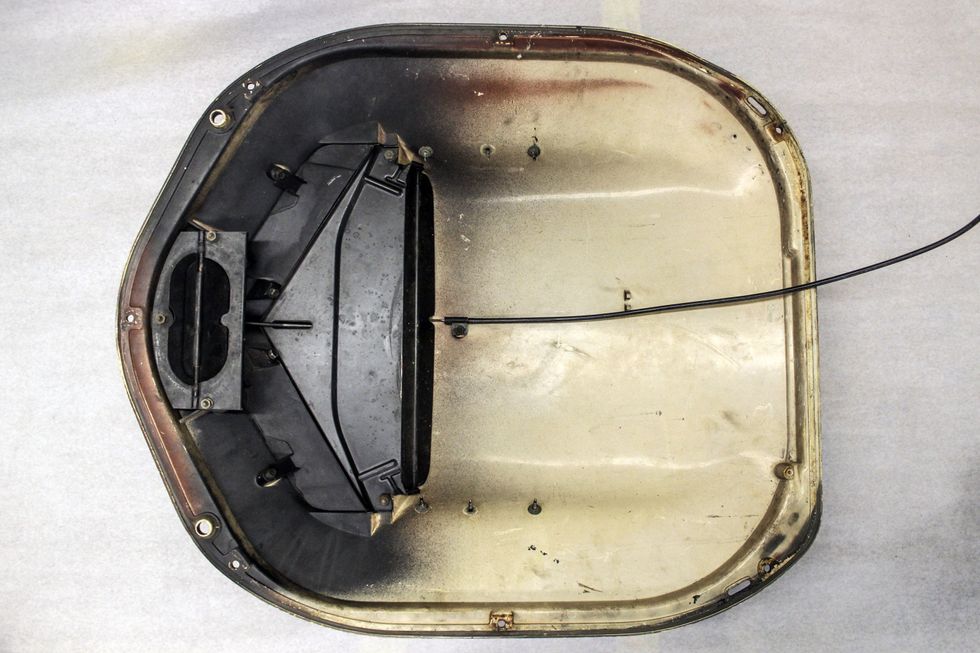
Both air doors shown in this photo were manufactured by Fram, while the bubble and the grilles were sourced from other vendors. The cable shown was from a supplier in Detroit. These air doors are currently being reproduced along with the grilles. For those individuals that found New Old Stock (NOS) parts over the years, the one difference between what came mounted on these bubbles, as opposed to what could be purchased over the counter at a dealer was that the dealer parts were stamped with a part number and with “Made in Canada.”
Mopar Shaker Scoop Restoration – Process
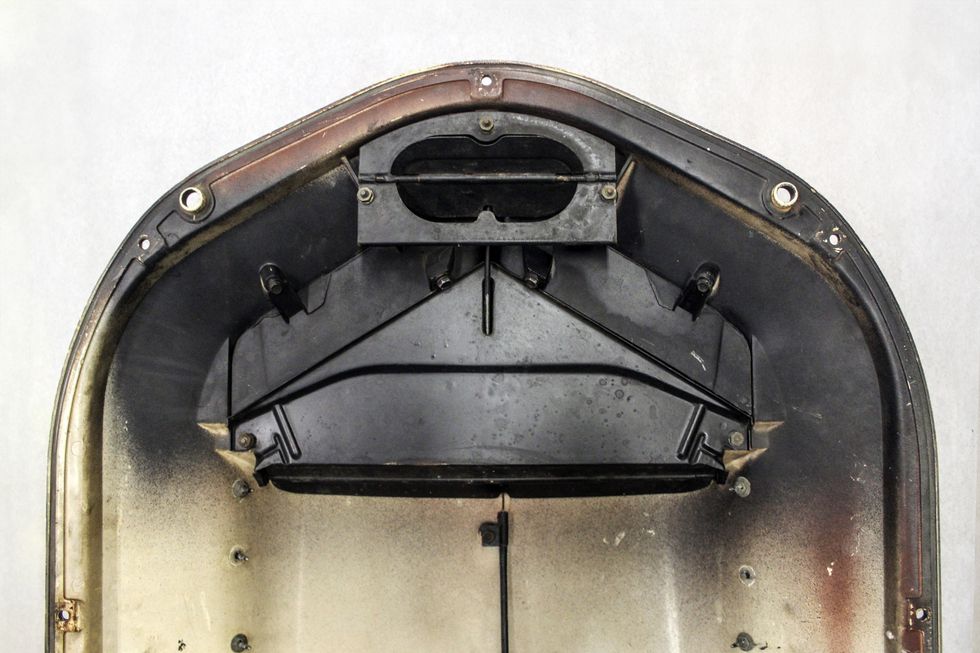
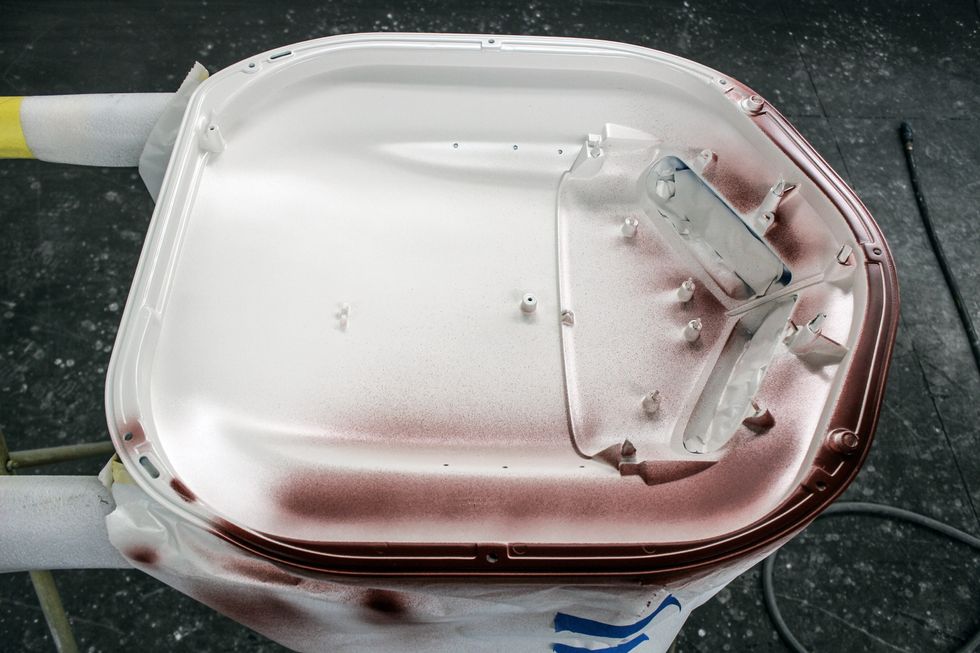
With the air doors and grilles removed the underside of the bubble shows the overspray pattern of the Organosol Black paint, grey sealer, red oxide primer, and the discoloration of the bubble’s surface. The same patterns would have been found on an Argent Silver bubble, while the Rallye Red bubbles were painted over red oxide primer without any grey sealer.
Understanding why this overspray is present on every bubble that was shipped from Fram requires an understanding of how they were painted. In preparation for regular production, when they started applying the Argent Silver paint in-house, the folks at Fram quickly realized that they were in over their heads because the process was time consuming and yielded uneven results. These overspray patterns differ slightly on every bubble because Fram developed a hanger system where two bubbles were hung by the mount holes in a clamshell pattern for painting. The lack of paint where the hooks were inserted can usually be seen on an unrestored bubble.
This was the process for both black and silver bubbles; however, it is believed that the red bubbles were painted by hand individually and don’t exhibit the same overspray patterns. Fram’s solution to the quality control issue with the paint was to have another vendor complete the painting and then deliver them ready to be assembled. North American Plastics in Wallaceburg, Ontario was the supplier that was making the 1970 and 1971 Cuda grilles, which were made of plastic and for the most part painted in Argent Silver, so they took over the task of applying the paint. Their process also involved the bubbles being hung in a clamshell layout which yielded similar overspray patterns. Due to the cancellation of the Rallye Red paint offering there are a few documented cases of Argent Silver painted bubbles that have Rallye Red paint underneath.
Mopar Shaker Scoop Restoration – Process
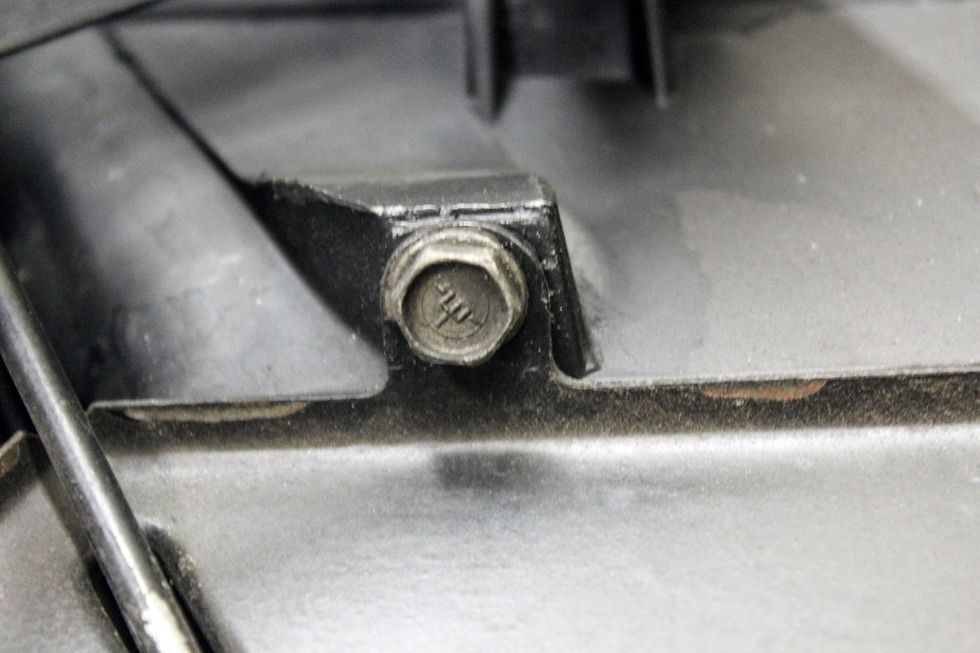
Part of the restoration process involves retaining the accuracy of all the assembly hardware that came from the factory. Documenting the specifics of items like the correct bolts and their markings is just one of several items on a check list. AMCR has compiled over the years a database of information gathered from every restoration performed on these assemblies, which allows them to correctly identify and correctly replace an item that might be missing.
Mopar Shaker Scoop Restoration – Process
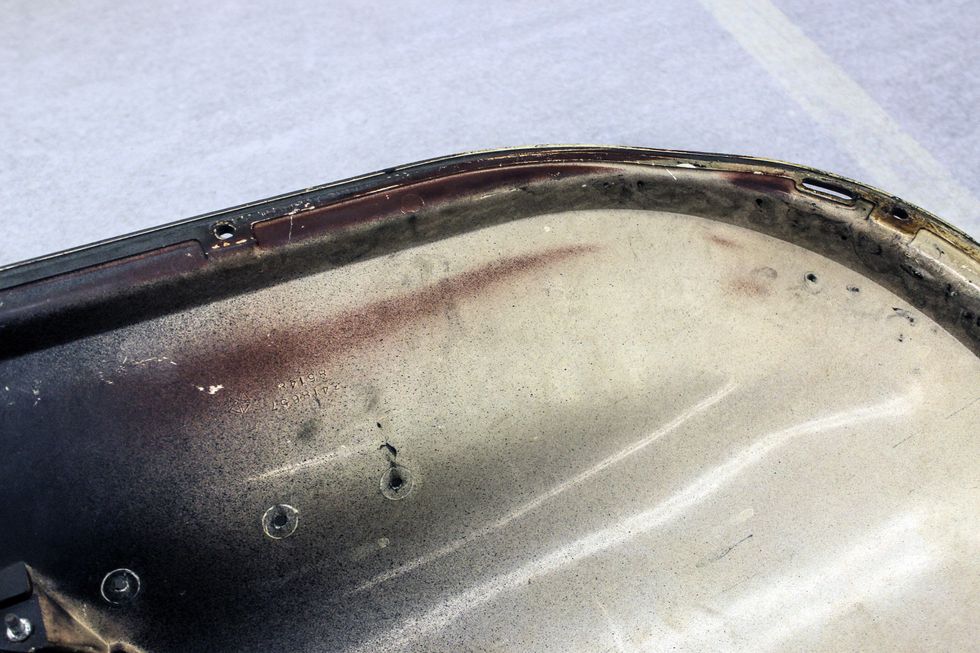
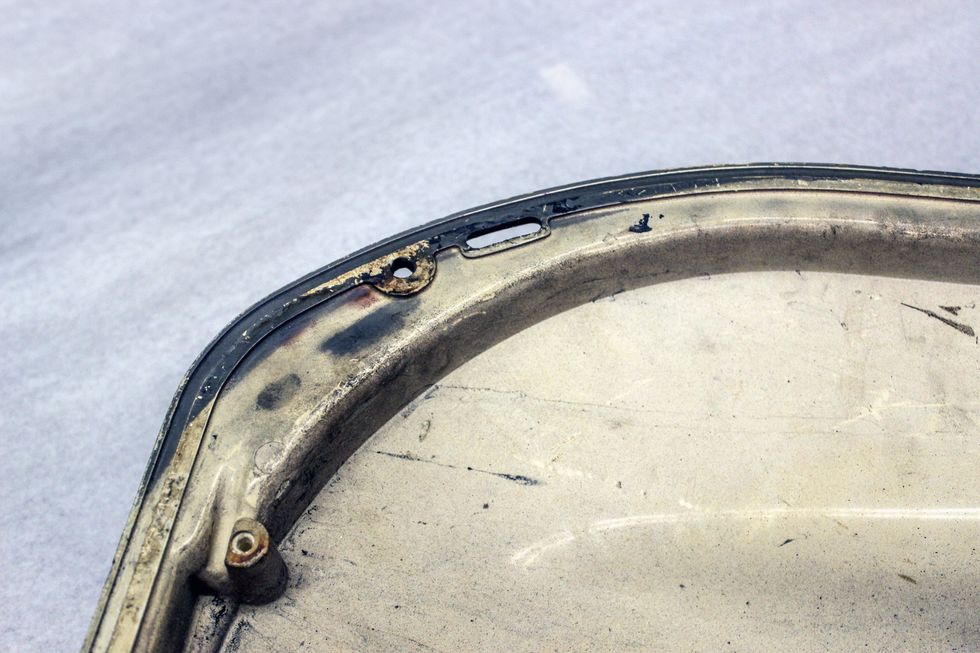
This photo shows the specific overspray patterns on this bubble when it was initially painted. These overspray patterns are unique to each bubble and AMCR will document their pattern and placement which will then be reproduced as part of the repainting process.
Mopar Shaker Scoop Restoration – Process

These are the parts that are fitted to the bubble. The air doors get fully restored and resprayed with a semi-gloss enamel that is identical to the original Fram finish, while the grilles will be painted with Organosol Black. Also shown are the emblems, air door rod, mounting hardware and air door cable.
Mopar Shaker Scoop Restoration – Process
With the bubble sanded down the layers of paint are shown. The layering of the red oxide, grey sealer, and Organosol topcoat illustrate the process. Also worth pointing out is the actual color of the of the material the bubble is made of. It is also at this stage in the restoration process that body work takes place. This bubble did not need any additional work; however, it is not uncommon to have bubbles that have suffered damage over the years and require additional repairs.
Mopar Shaker Scoop Restoration – Process
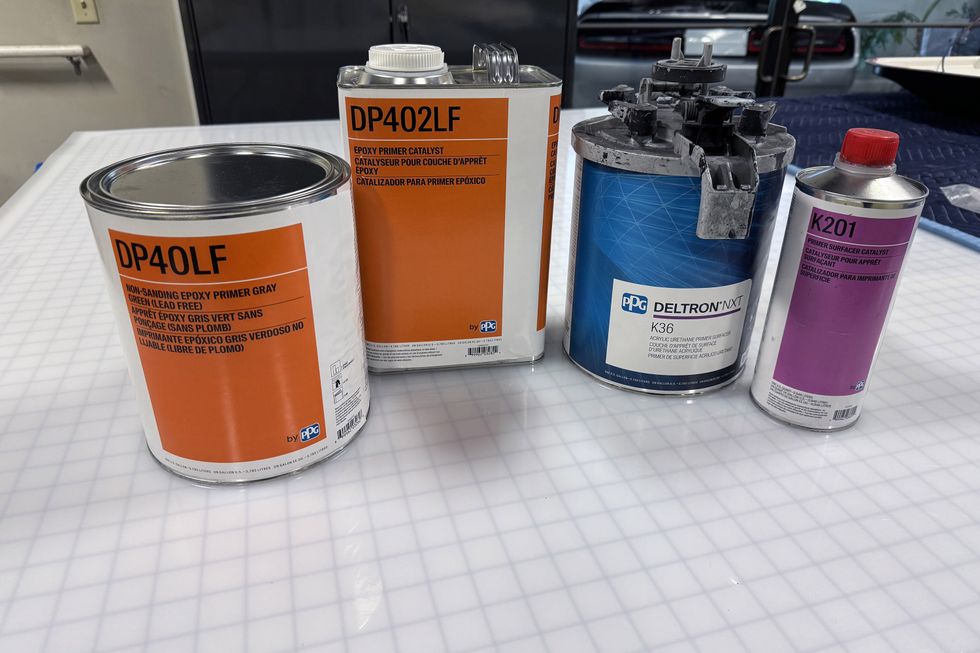
The prep after any bodywork is performed comes down to using a mix of PPG acrylic primers before the various overspray layers are applied.
Mopar Shaker Scoop Restoration – Process
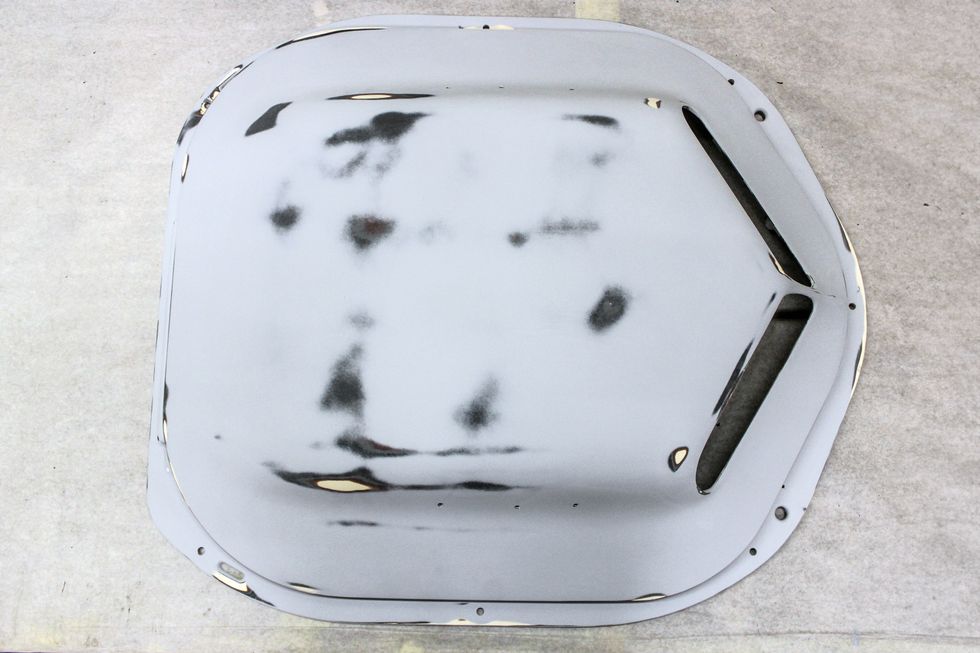
The first step in the repaint process involves the application of a high build primer. This is applied to both the top and bottom of the bubble. After that is laid down and allowed to dry, the bubble is then block sanded.
Mopar Shaker Scoop Restoration – Process
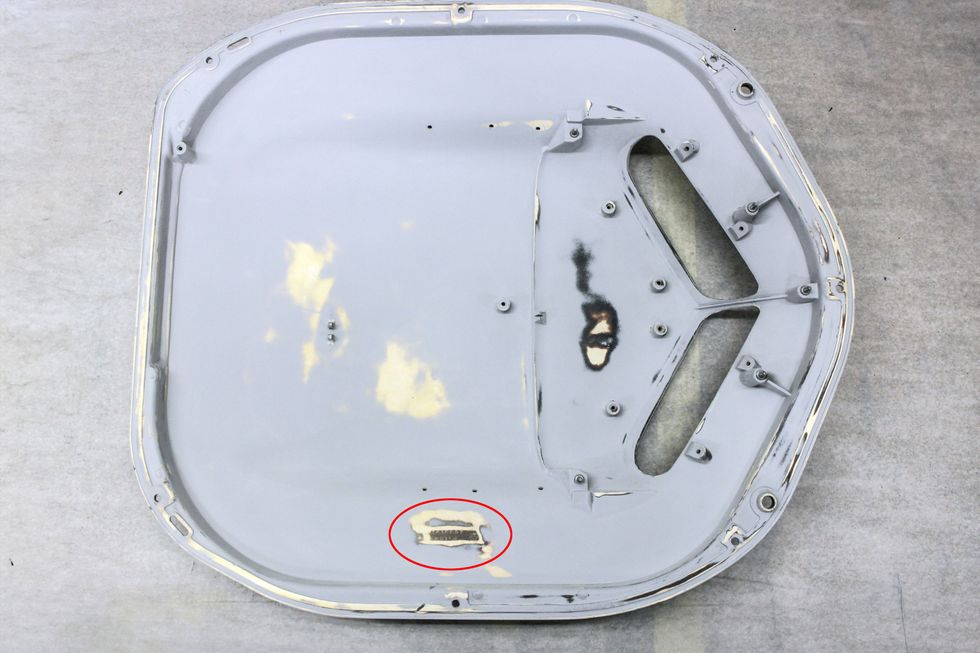
The first step in the repaint process involves the application of a high build primer. This is applied to both the top and bottom of the bubble. After that is laid down and allowed to dry, the bubble is then block sanded. The circled area on the underside denotes the location of the raised part number for the bubble. AMCR’s attention to detail with these restorations is shown in the extra care they take by masking off this area on the bubble prior to any paint application so that it does not get buried in paint.
Mopar Shaker Scoop Restoration – Process
The application of primer sealer is the last step before any color is laid down.
Mopar Shaker Scoop Restoration – Process
At this point in the restoration is where the extra attention to detail and the documentation in the teardown process comes into play. The first thing that is addressed is the application of a layer of plastic dye that AMCR has formulated that mimics the original color and surface texture on a bare bubble. The addition of the red oxide primer is also duplicated based on reference photos.
Mopar Shaker Scoop Restoration – Process
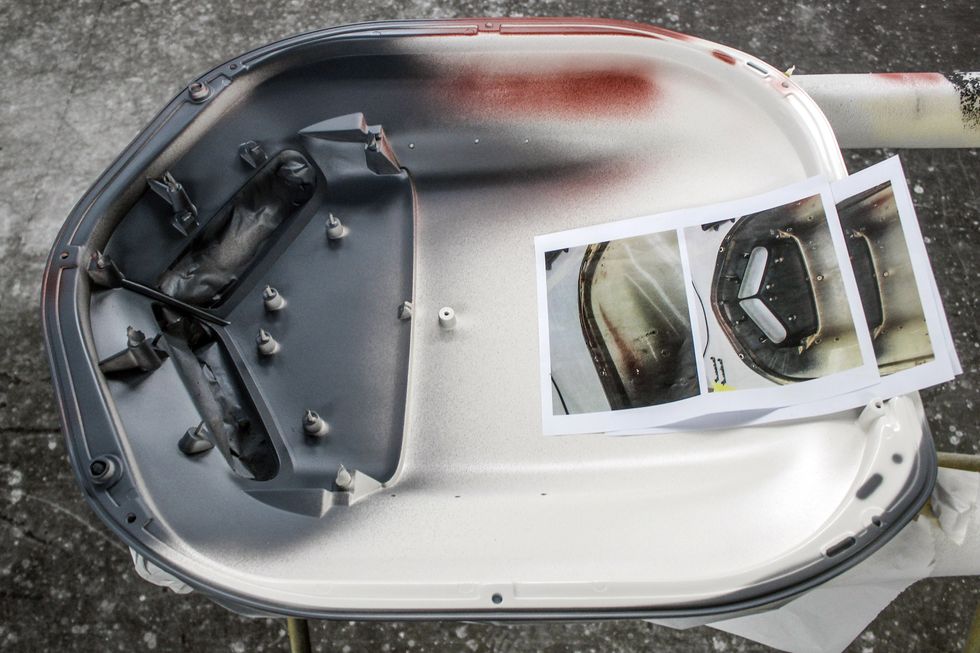
These photos show the next step in the paint process with the application of the grey sealer. Always going back to reference photos, the crew at AMCR meticulously duplicate what was originally on the bubble. Small details like overspray created by the opposing bubble on the paint rack are duplicated with templates that mirror the shapes needed.
Mopar Shaker Scoop Restoration – Process
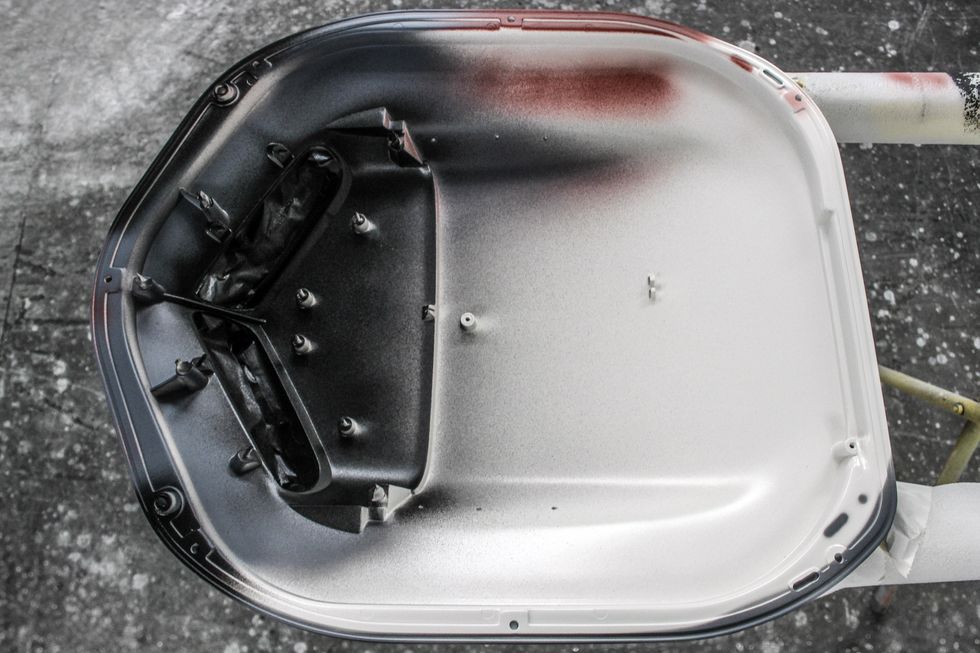
This is the final step on the underside with the Organosol overspray prior to the reinstallation of all the restored parts.
Mopar Shaker Scoop Restoration – Process
The application of the Organisol Black will give a unique texture to the finish on the bubble. Since this application uses the original PPG acrylic lacquer, the requirements for maintenance are very specific. Any paste wax will compromise the integrity of the textured finish, and the use of a towel to clean the surface in a sweeping motion will also compromise the texture. The safest way to perform any kind of surface maintenance is to use something that is lint free, and the cleaning process must be done by dabbing the surface to remove dust.
Mopar Shaker Scoop Restoration – Process
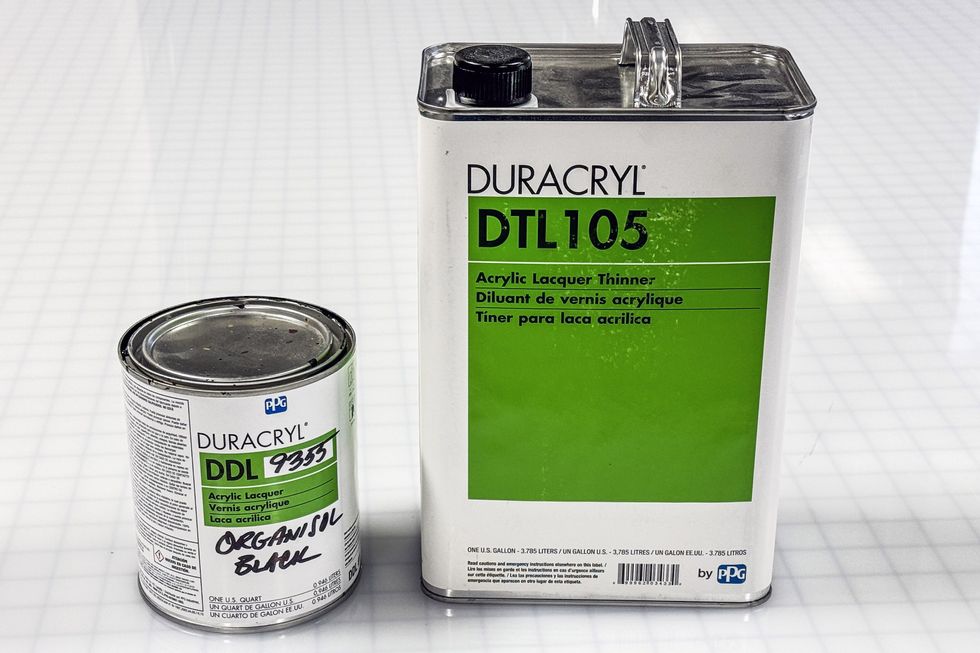
The Organisol Black Duracryl acrylic lacquer is what AMCR uses on all its black Shaker bubble restorations. This paint was discontinued by PPG many years ago because of its lacquer base and the environmental concerns with its use.
Mopar Shaker Scoop Restoration – Process

The underside of the bubble shows all the fully restored parts reinstalled. At some point in its life this Shaker assembly lost its copper ground straps. These have been added as part of the restoration.
Mopar Shaker Scoop Restoration – Process
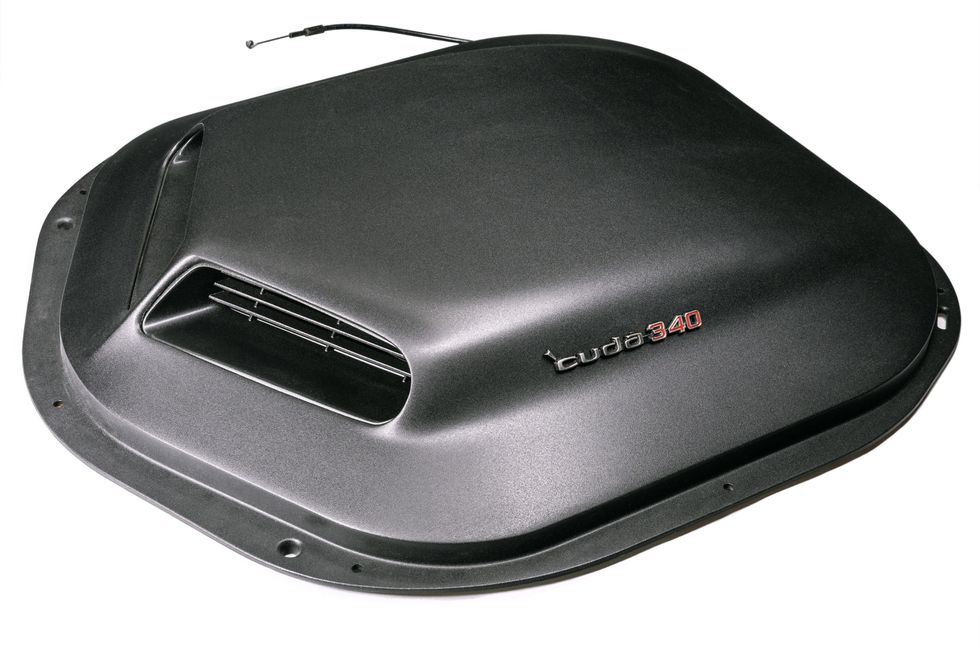
The finished assembly brings this Shaker bubble back to its original look as it rolled out of the Hamtramck assembly plant. Worth pointing out on these assemblies are the emblems. While they look identical to what would have come on the standard Rallye hood, they are in fact different. Shaker bubble emblems used a longer three pin emblem that is retained using speed nuts, while the emblems used on the Rallye hood were a shorter two-pin design that used plastic expansion sleeves to hold them in place.
Commercials Cooperation Advertisements:
(1) IT Teacher IT Freelance

立刻註冊及報名電腦補習課程吧!
电子计算机 -教育 -IT 電腦班” ( IT電腦補習 ) 提供一個方便的电子计算机 教育平台, 為大家配對信息技术, 電腦 老師, IT freelance 和 programming expert. 讓大家方便地就能找到合適的電腦補習, 電腦班, 家教, 私人老師.
We are a education and information platform which you can find a IT private tutorial teacher or freelance.
Also we provide different information about information technology, Computer, programming, mobile, Android, apple, game, movie, anime, animation…
(2) ITSec

www.ITSeceu.uk
Secure Your Computers from Cyber Threats and mitigate risks with professional services to defend Hackers.
ITSec provide IT Security and Compliance Services, including IT Compliance Services, Risk Assessment, IT Audit, Security Assessment and Audit, ISO 27001 Consulting and Certification, GDPR Compliance Services, Privacy Impact Assessment (PIA), Penetration test, Ethical Hacking, Vulnerabilities scan, IT Consulting, Data Privacy Consulting, Data Protection Services, Information Security Consulting, Cyber Security Consulting, Network Security Audit, Security Awareness Training.
Contact us right away.
Email (Prefer using email to contact us):
SalesExecutive@ITSec.vip